
Quick Start
- Turn on your launch monitor, if not already on.
- Start the simulator software you plan to use.
- Open rēlā.
- Confirm the Device dropdown is set to your launch monitor. The installer sets this default.
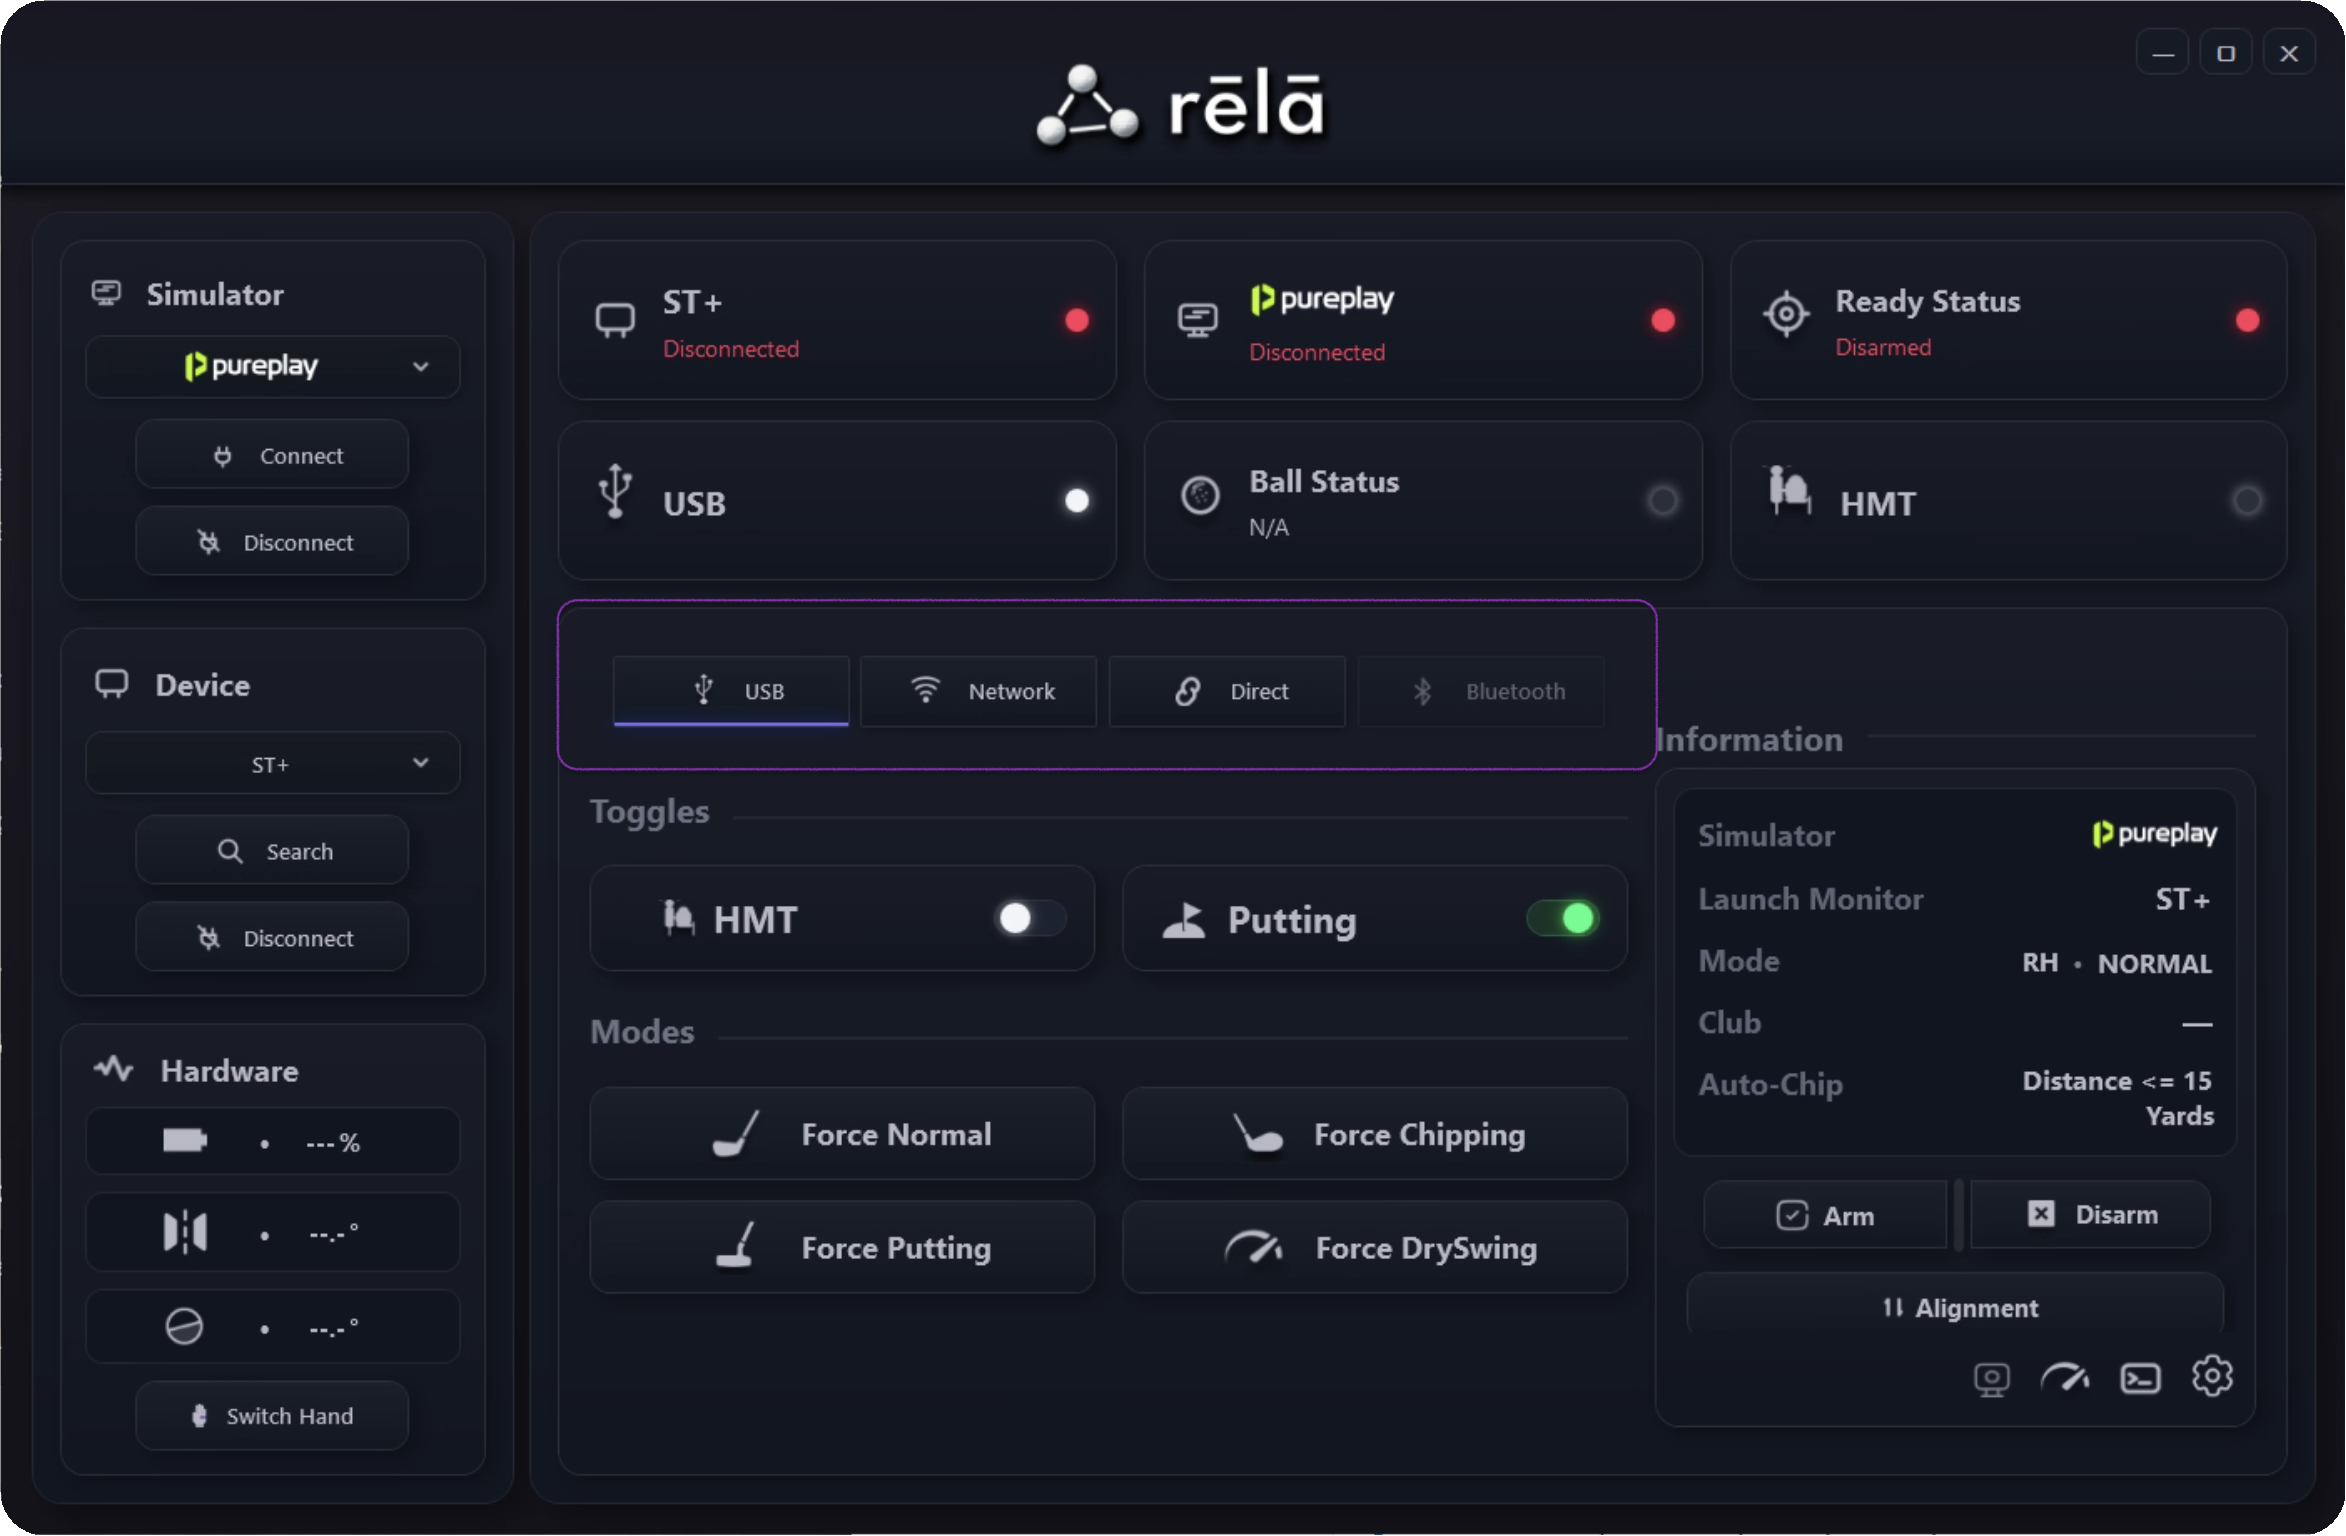
- Choose the connection type, when that control is available for the selected device.
- Click Search under Device and let the launch monitor connect first.
- Confirm the Simulator dropdown is set to the simulator you are using. The installer sets this default.
- Once the launch monitor connects, rēlā will auto-connect to the selected simulator.
- Wait for the status rows to show device connectivity, simulator connectivity, and ball state.
Main Window
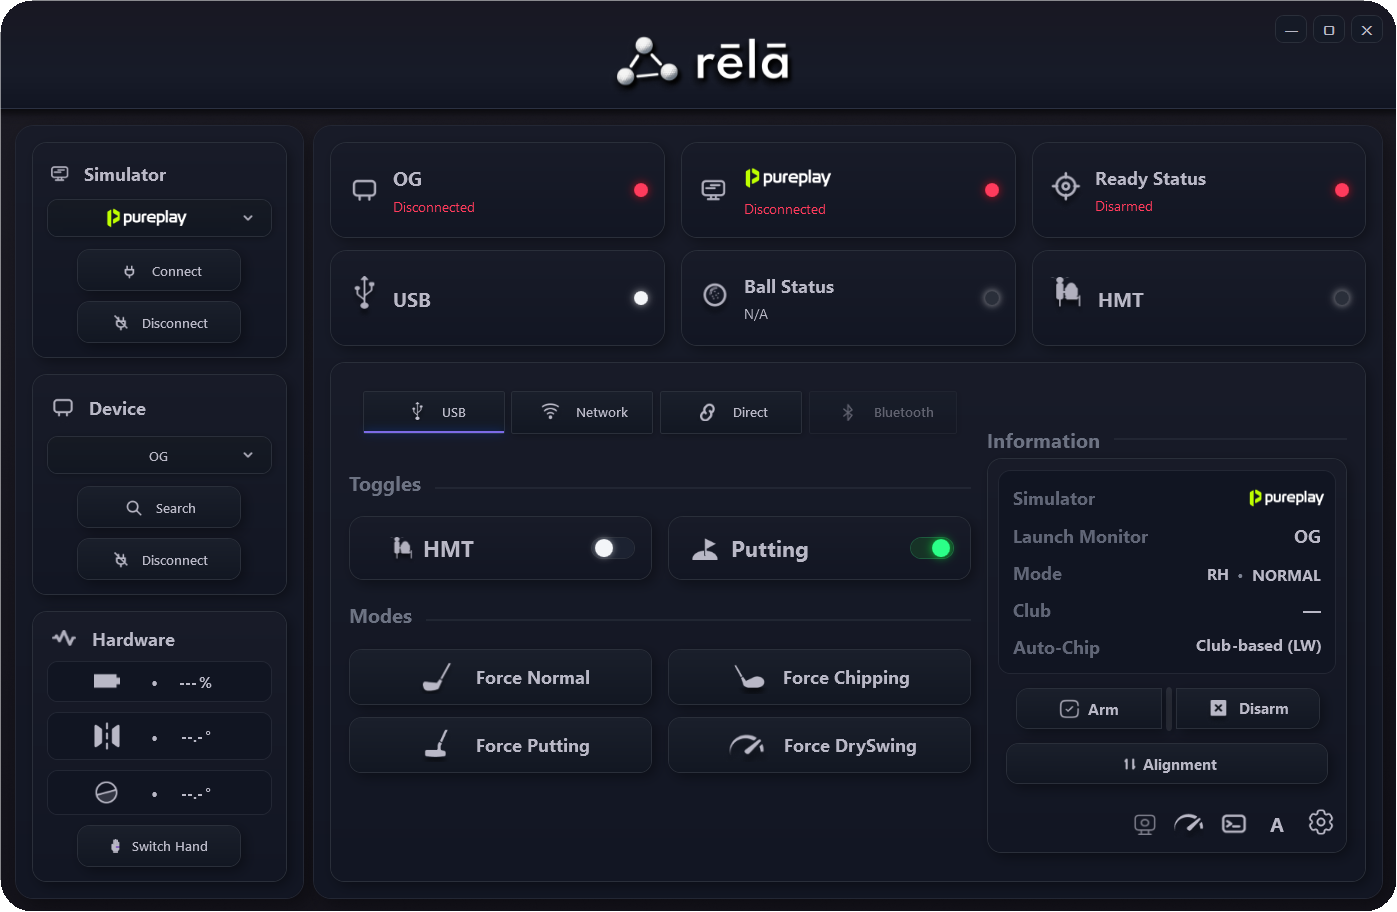
Simulator
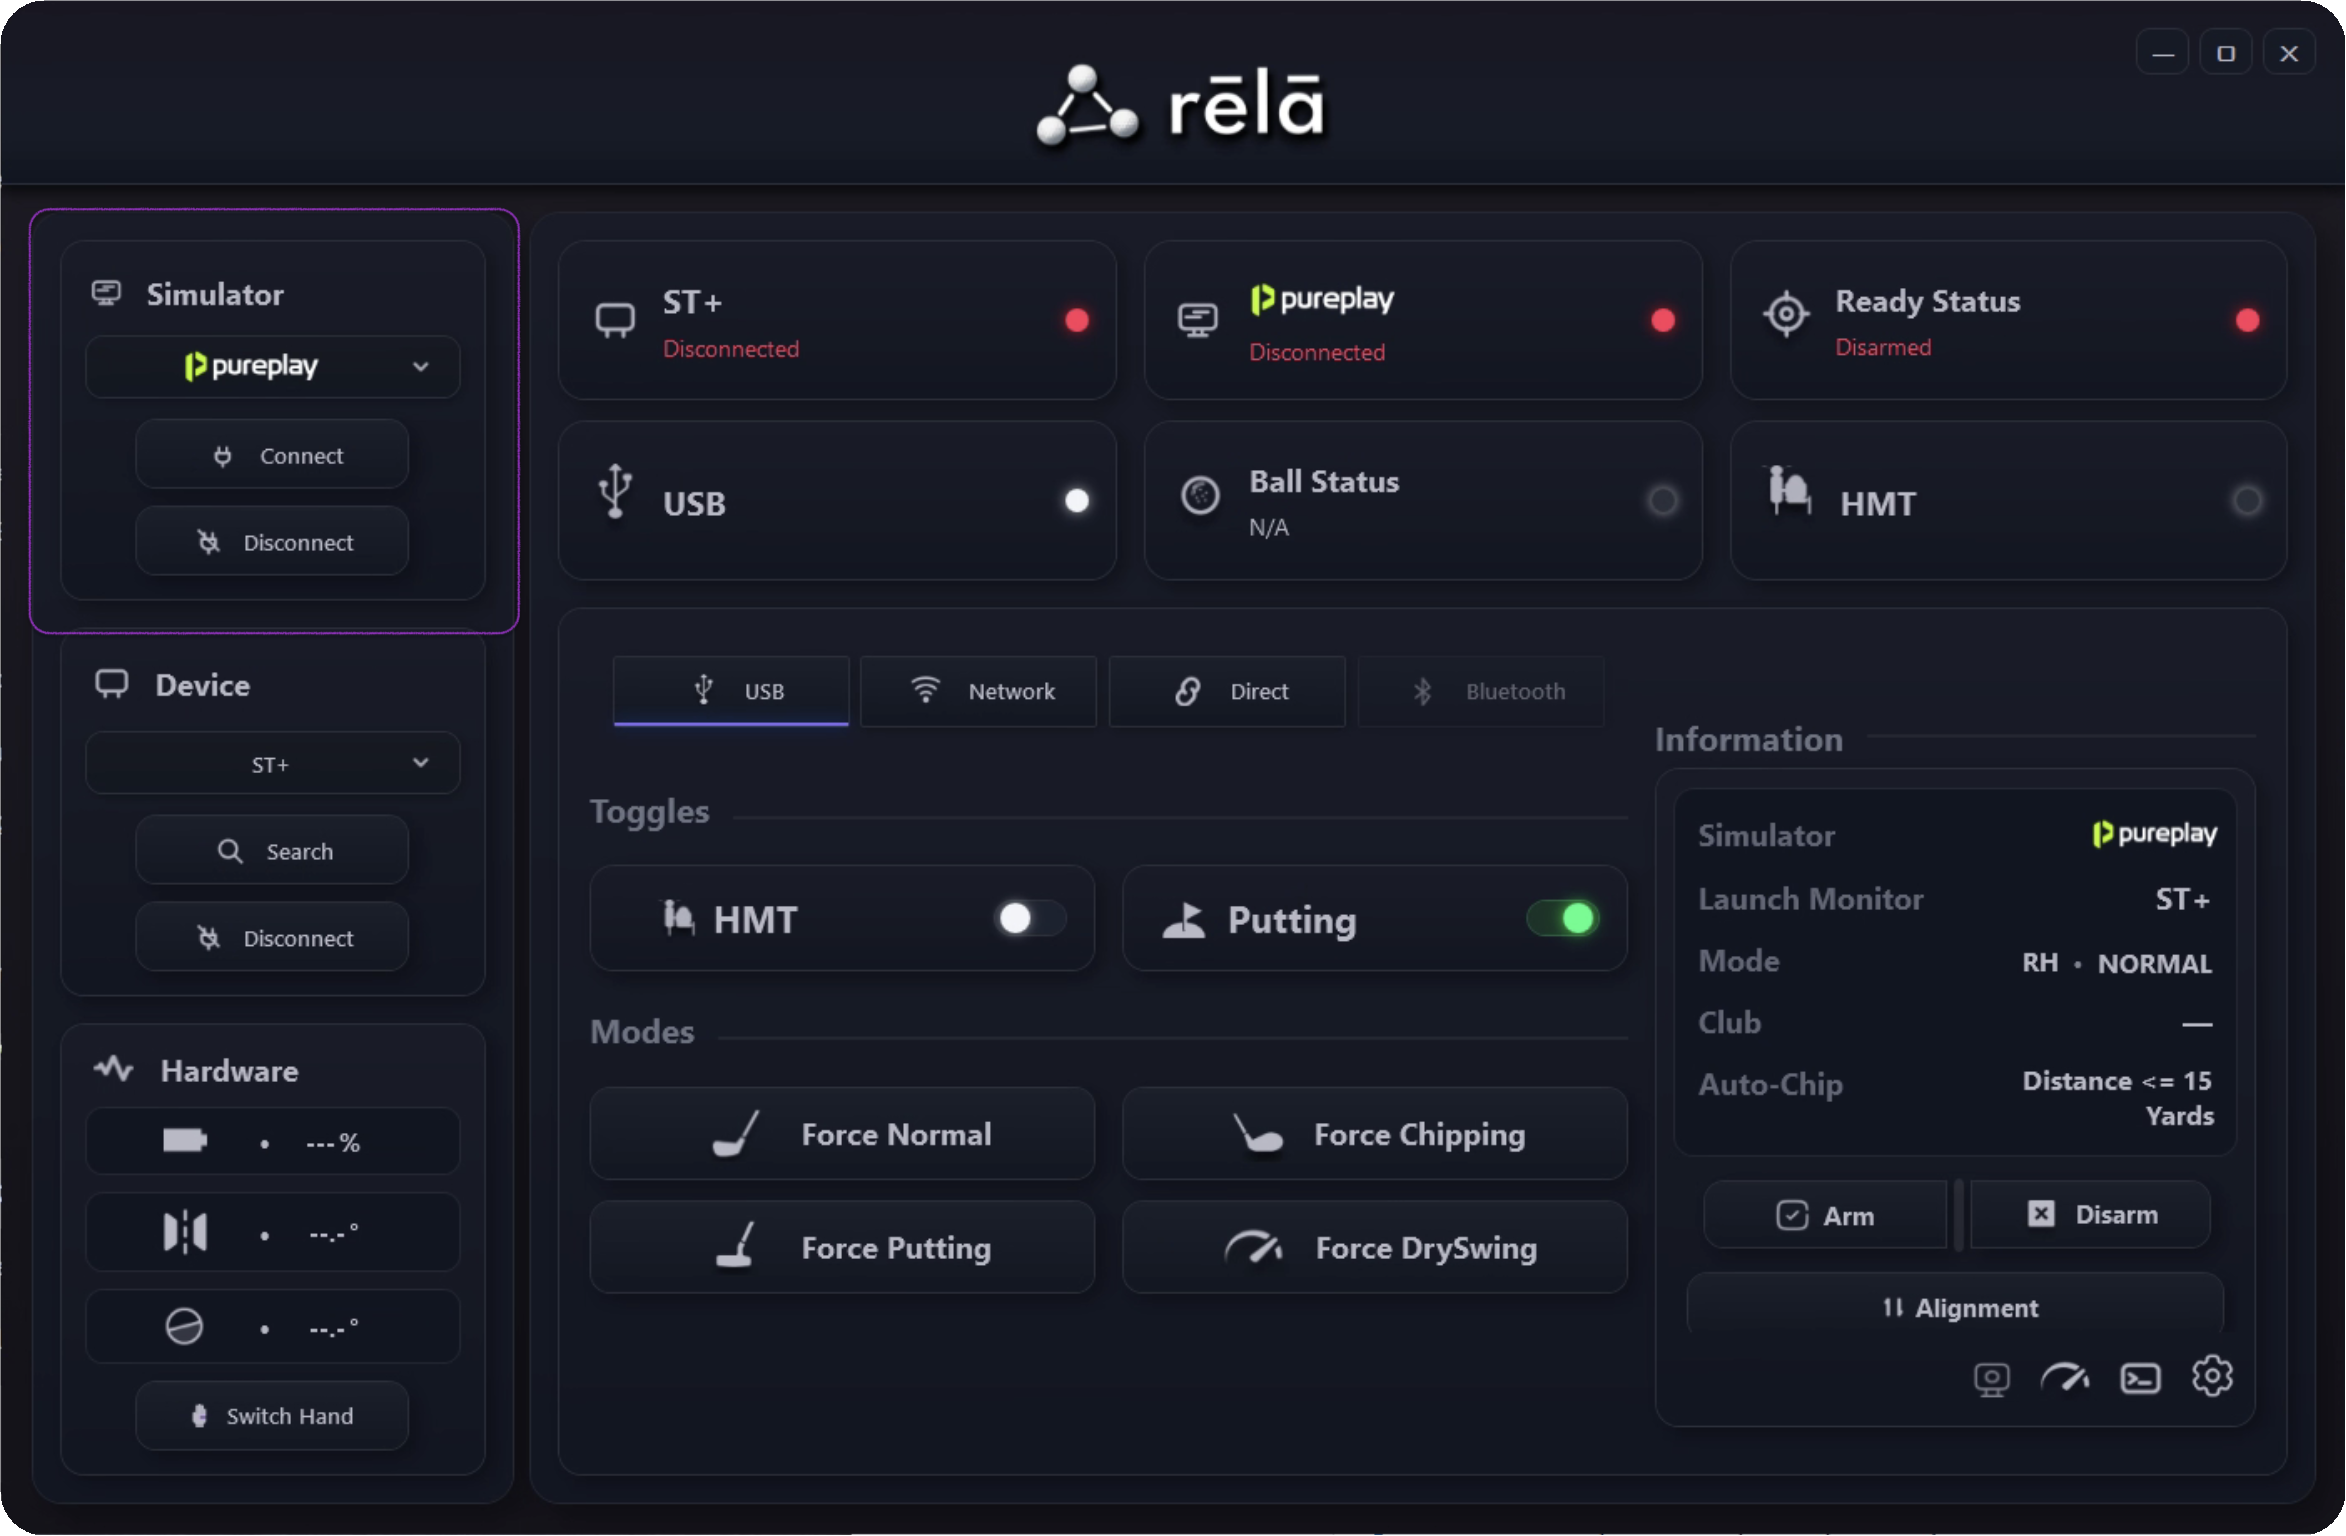
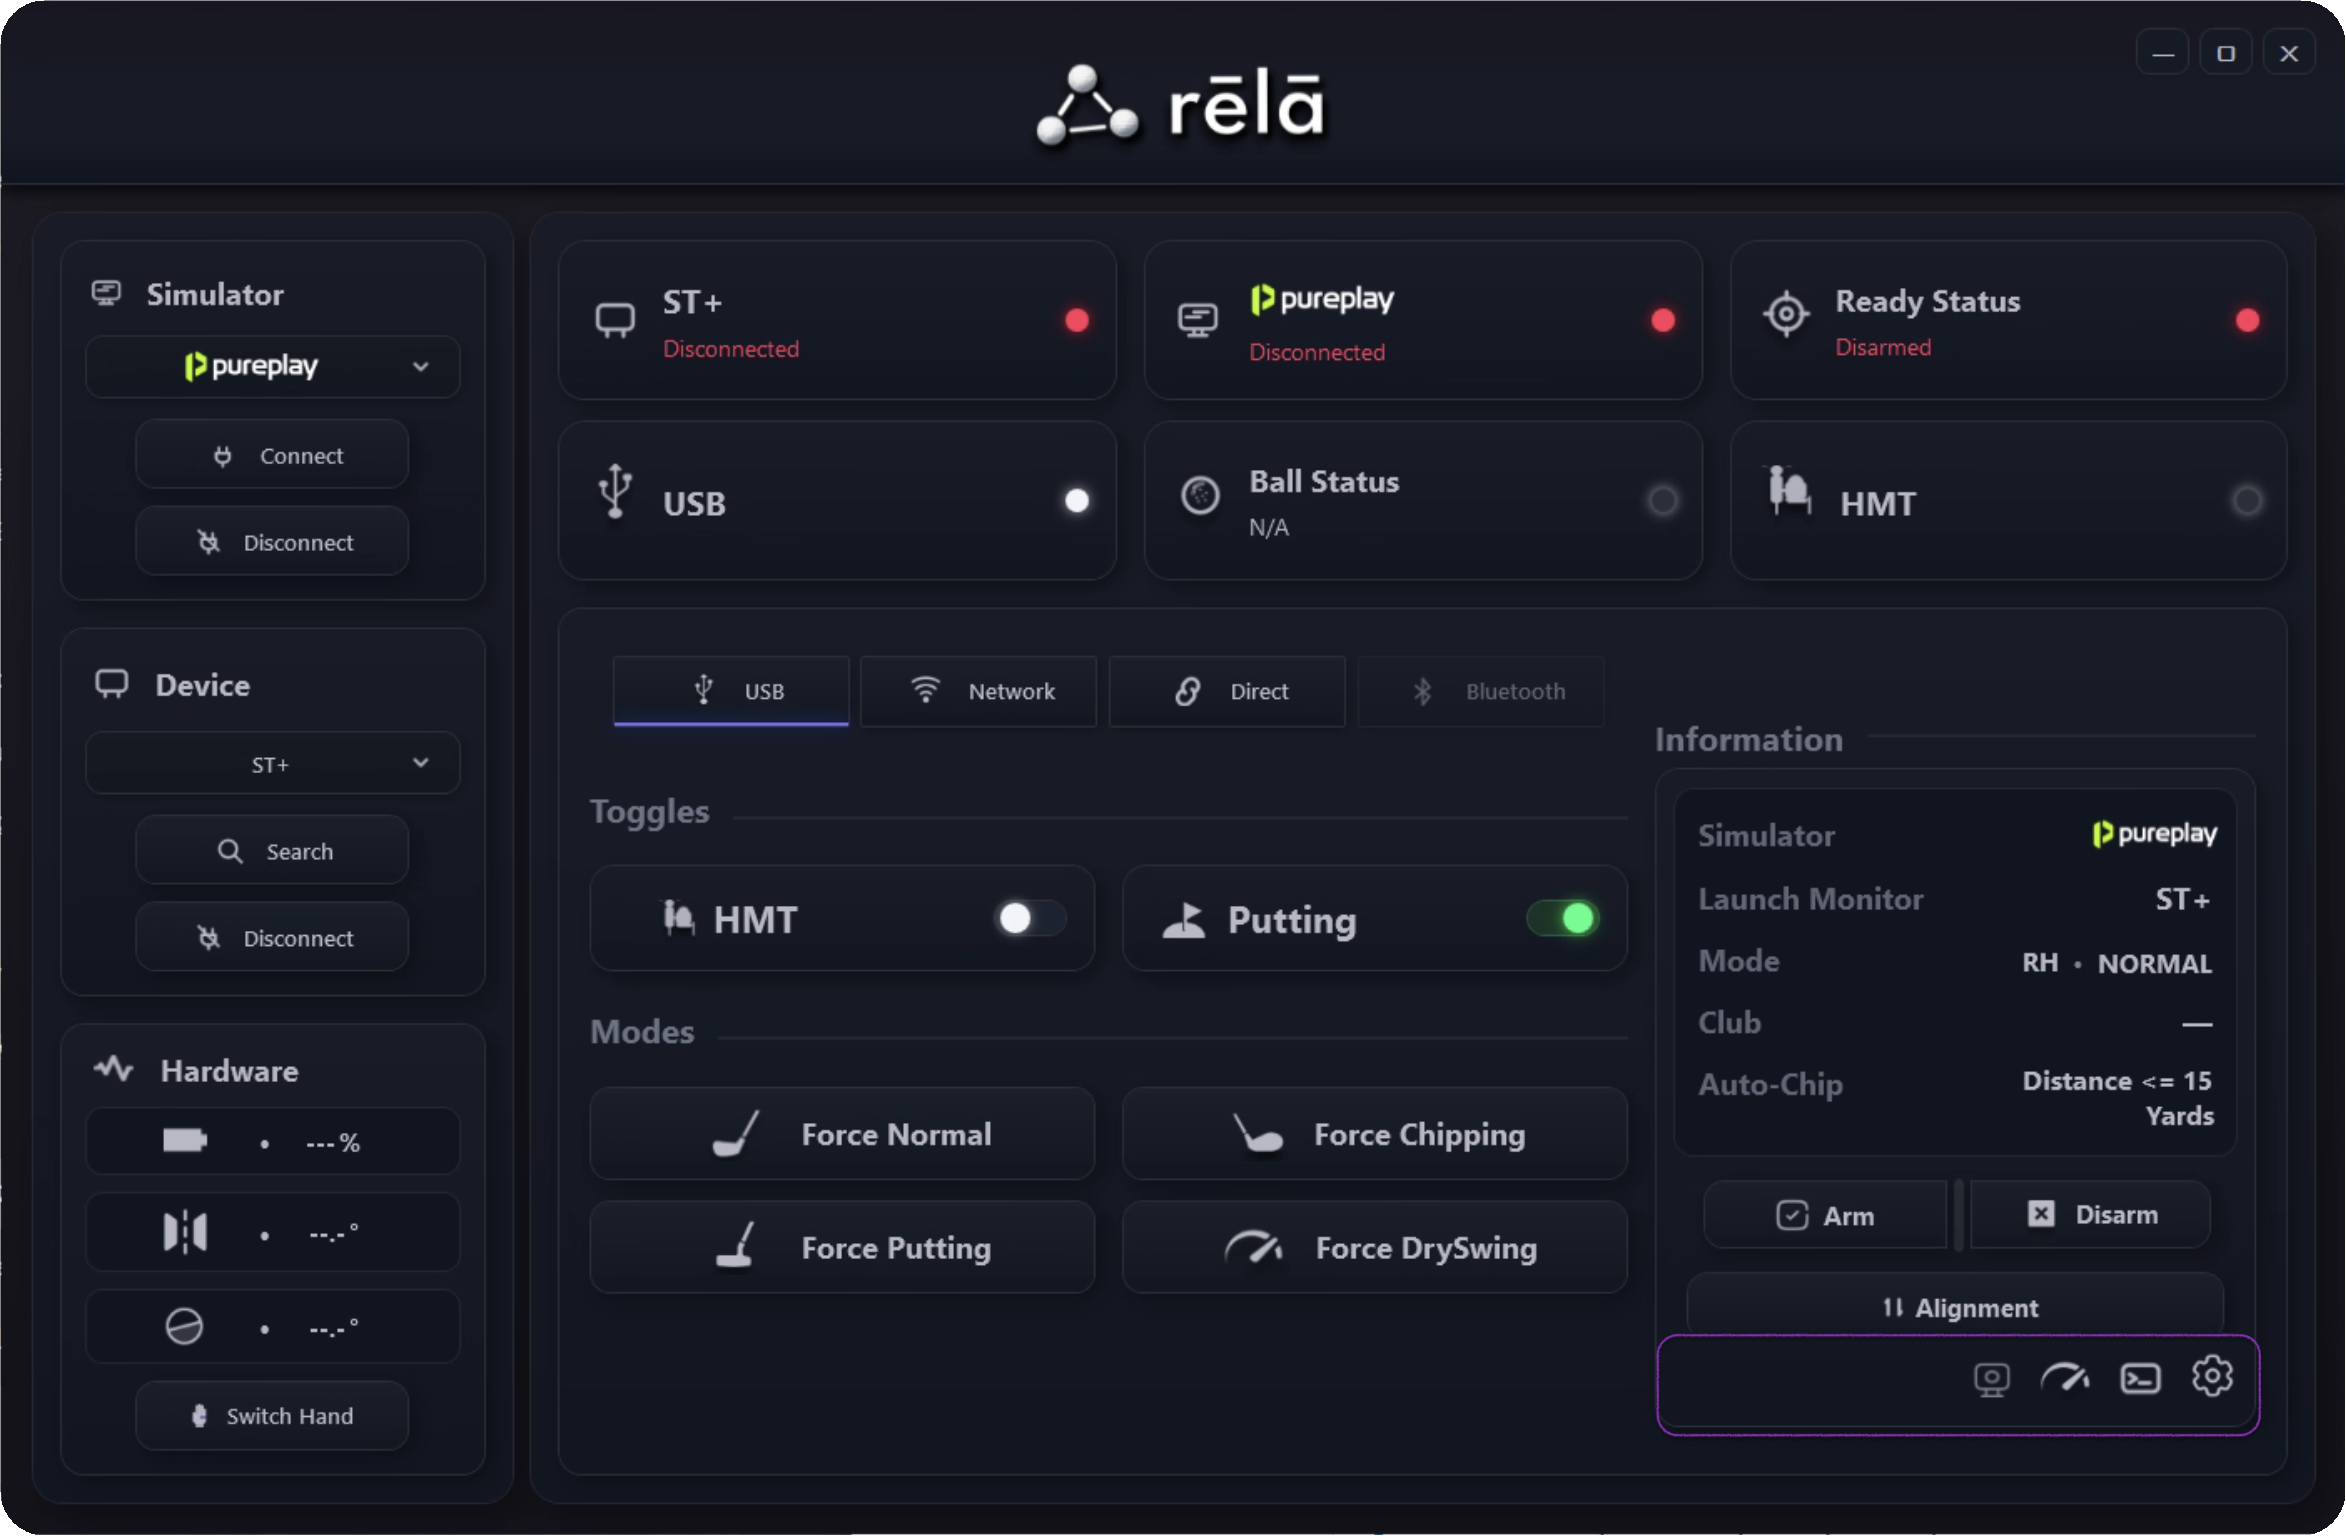
Select the simulator output rēlā should send shots to. Common options include Pureplay, GSPro, Infinite Tees, drills, Golf Simulator Toolkit, and OpenGolfSim.
Device
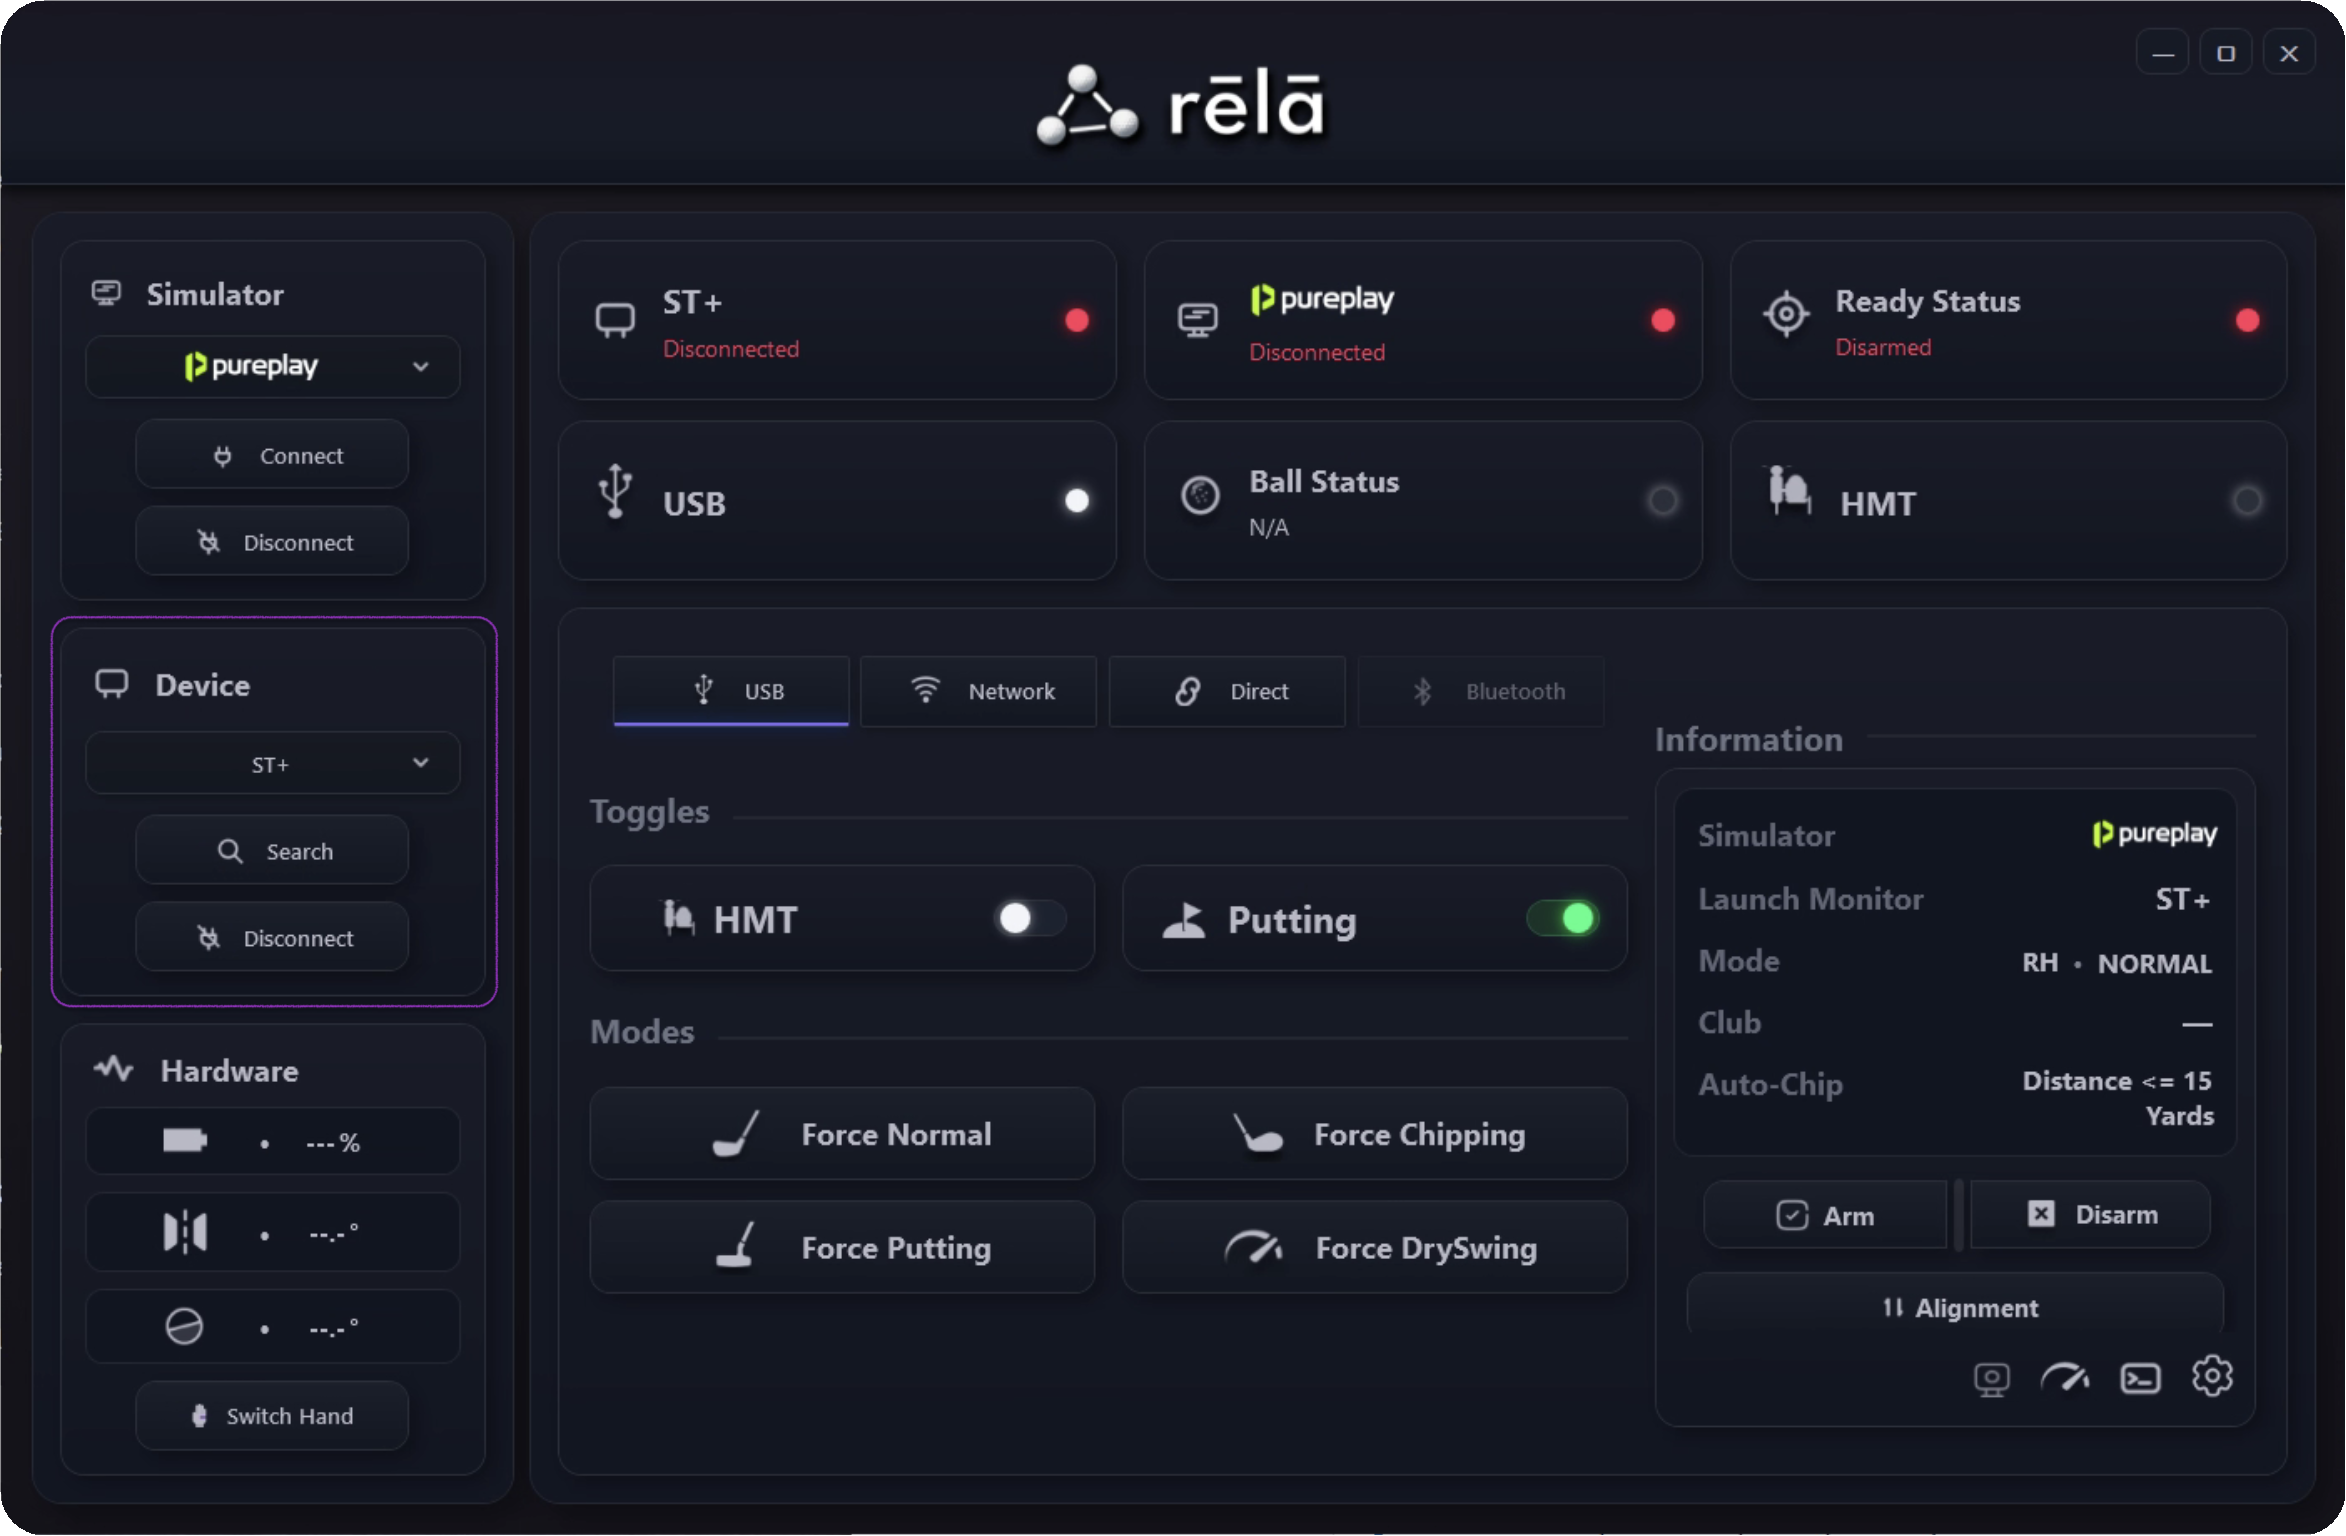
Select the launch monitor rēlā should use. Use the device controls to search, connect, or disconnect depending on the selected device.
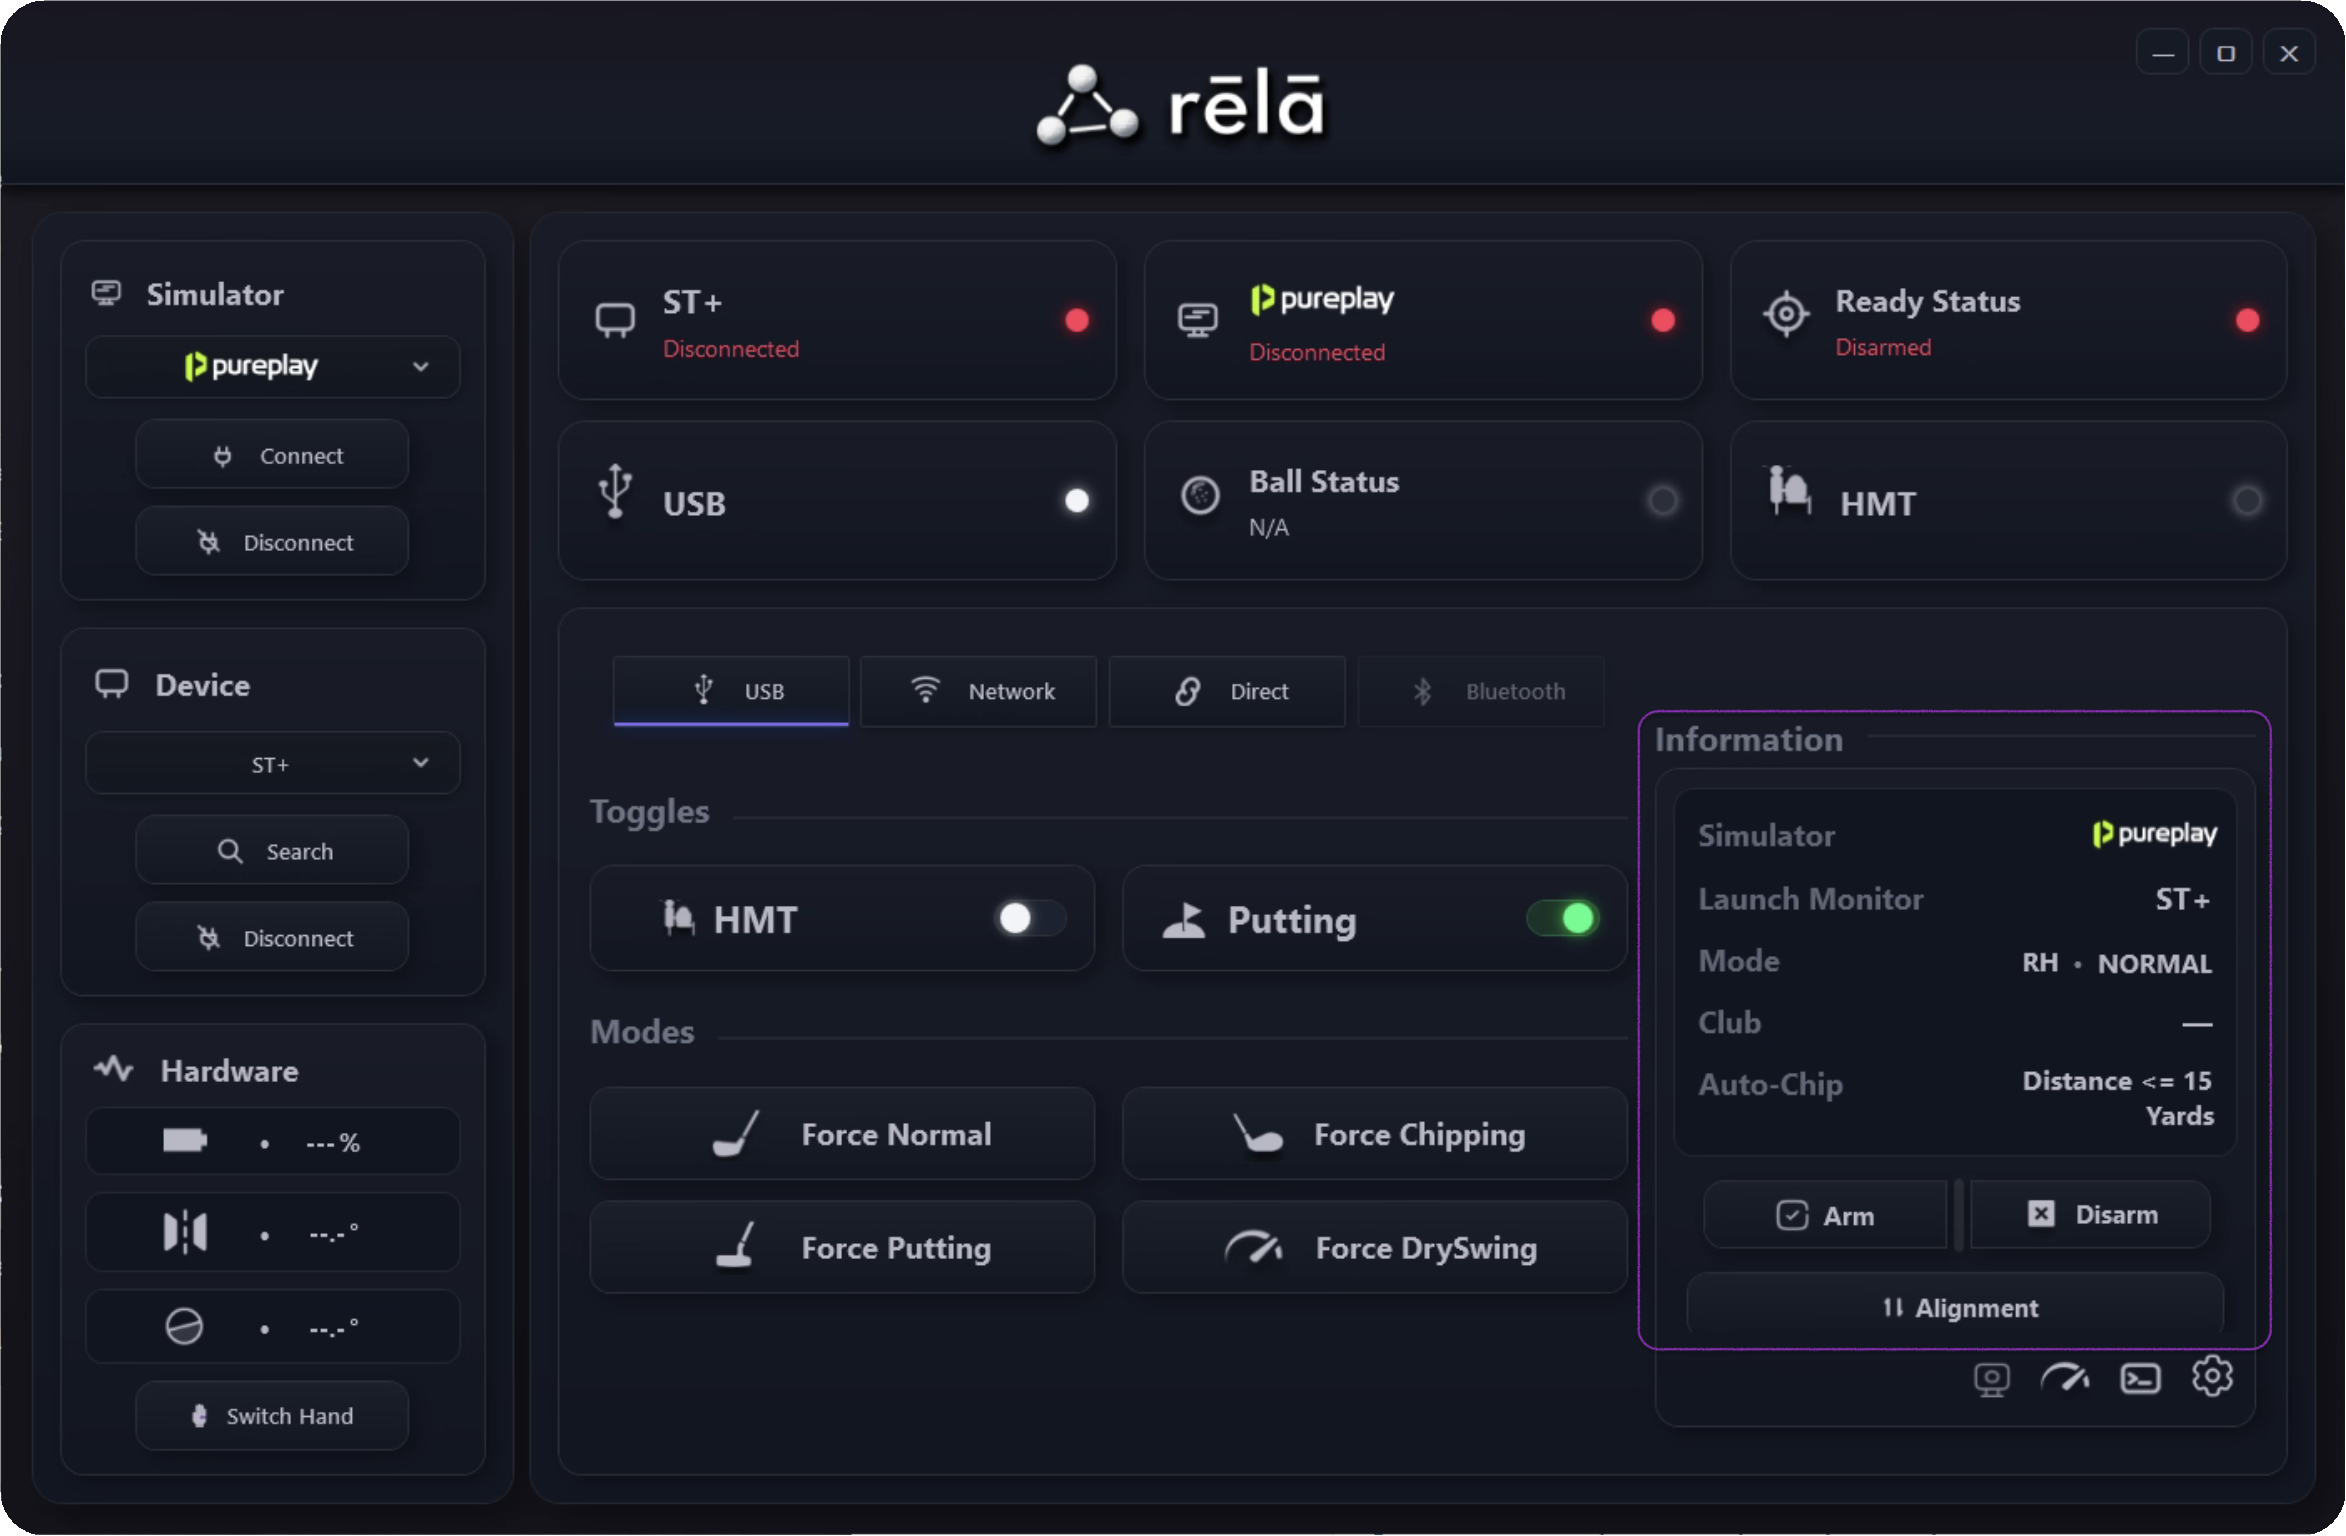
Hardware
Shows hardware details when the selected device reports them, such as battery, tilt, and roll.
Status Tiles
Show simulator type, launch monitor type, connection status, ready state, ball status, mode, and club.
How to Connect
Use the launch monitor as the first connection point. rēlā can then connect the selected simulator after the device is online.
First Connection
- Turn on the launch monitor.
- Launch the simulator software.
- Launch rēlā.
- Confirm the Device dropdown. The installer sets this from your setup choices.
- Set the connection type, when applicable.
- Click Search under Device.
- Confirm the Simulator dropdown only if you need to change it.
- Wait for rēlā to auto-connect to the simulator.
- Confirm the status rows show connectivity and ball state.
Every Launch After
- Turn on the launch monitor.
- Launch the simulator software.
- Launch rēlā.
- Click Search under Device.
- Wait for rēlā to connect the saved device and simulator.
For a more automatic startup, enable Auto Connect and Discover in Settings. This makes it so the device is searched for on launch automatically.
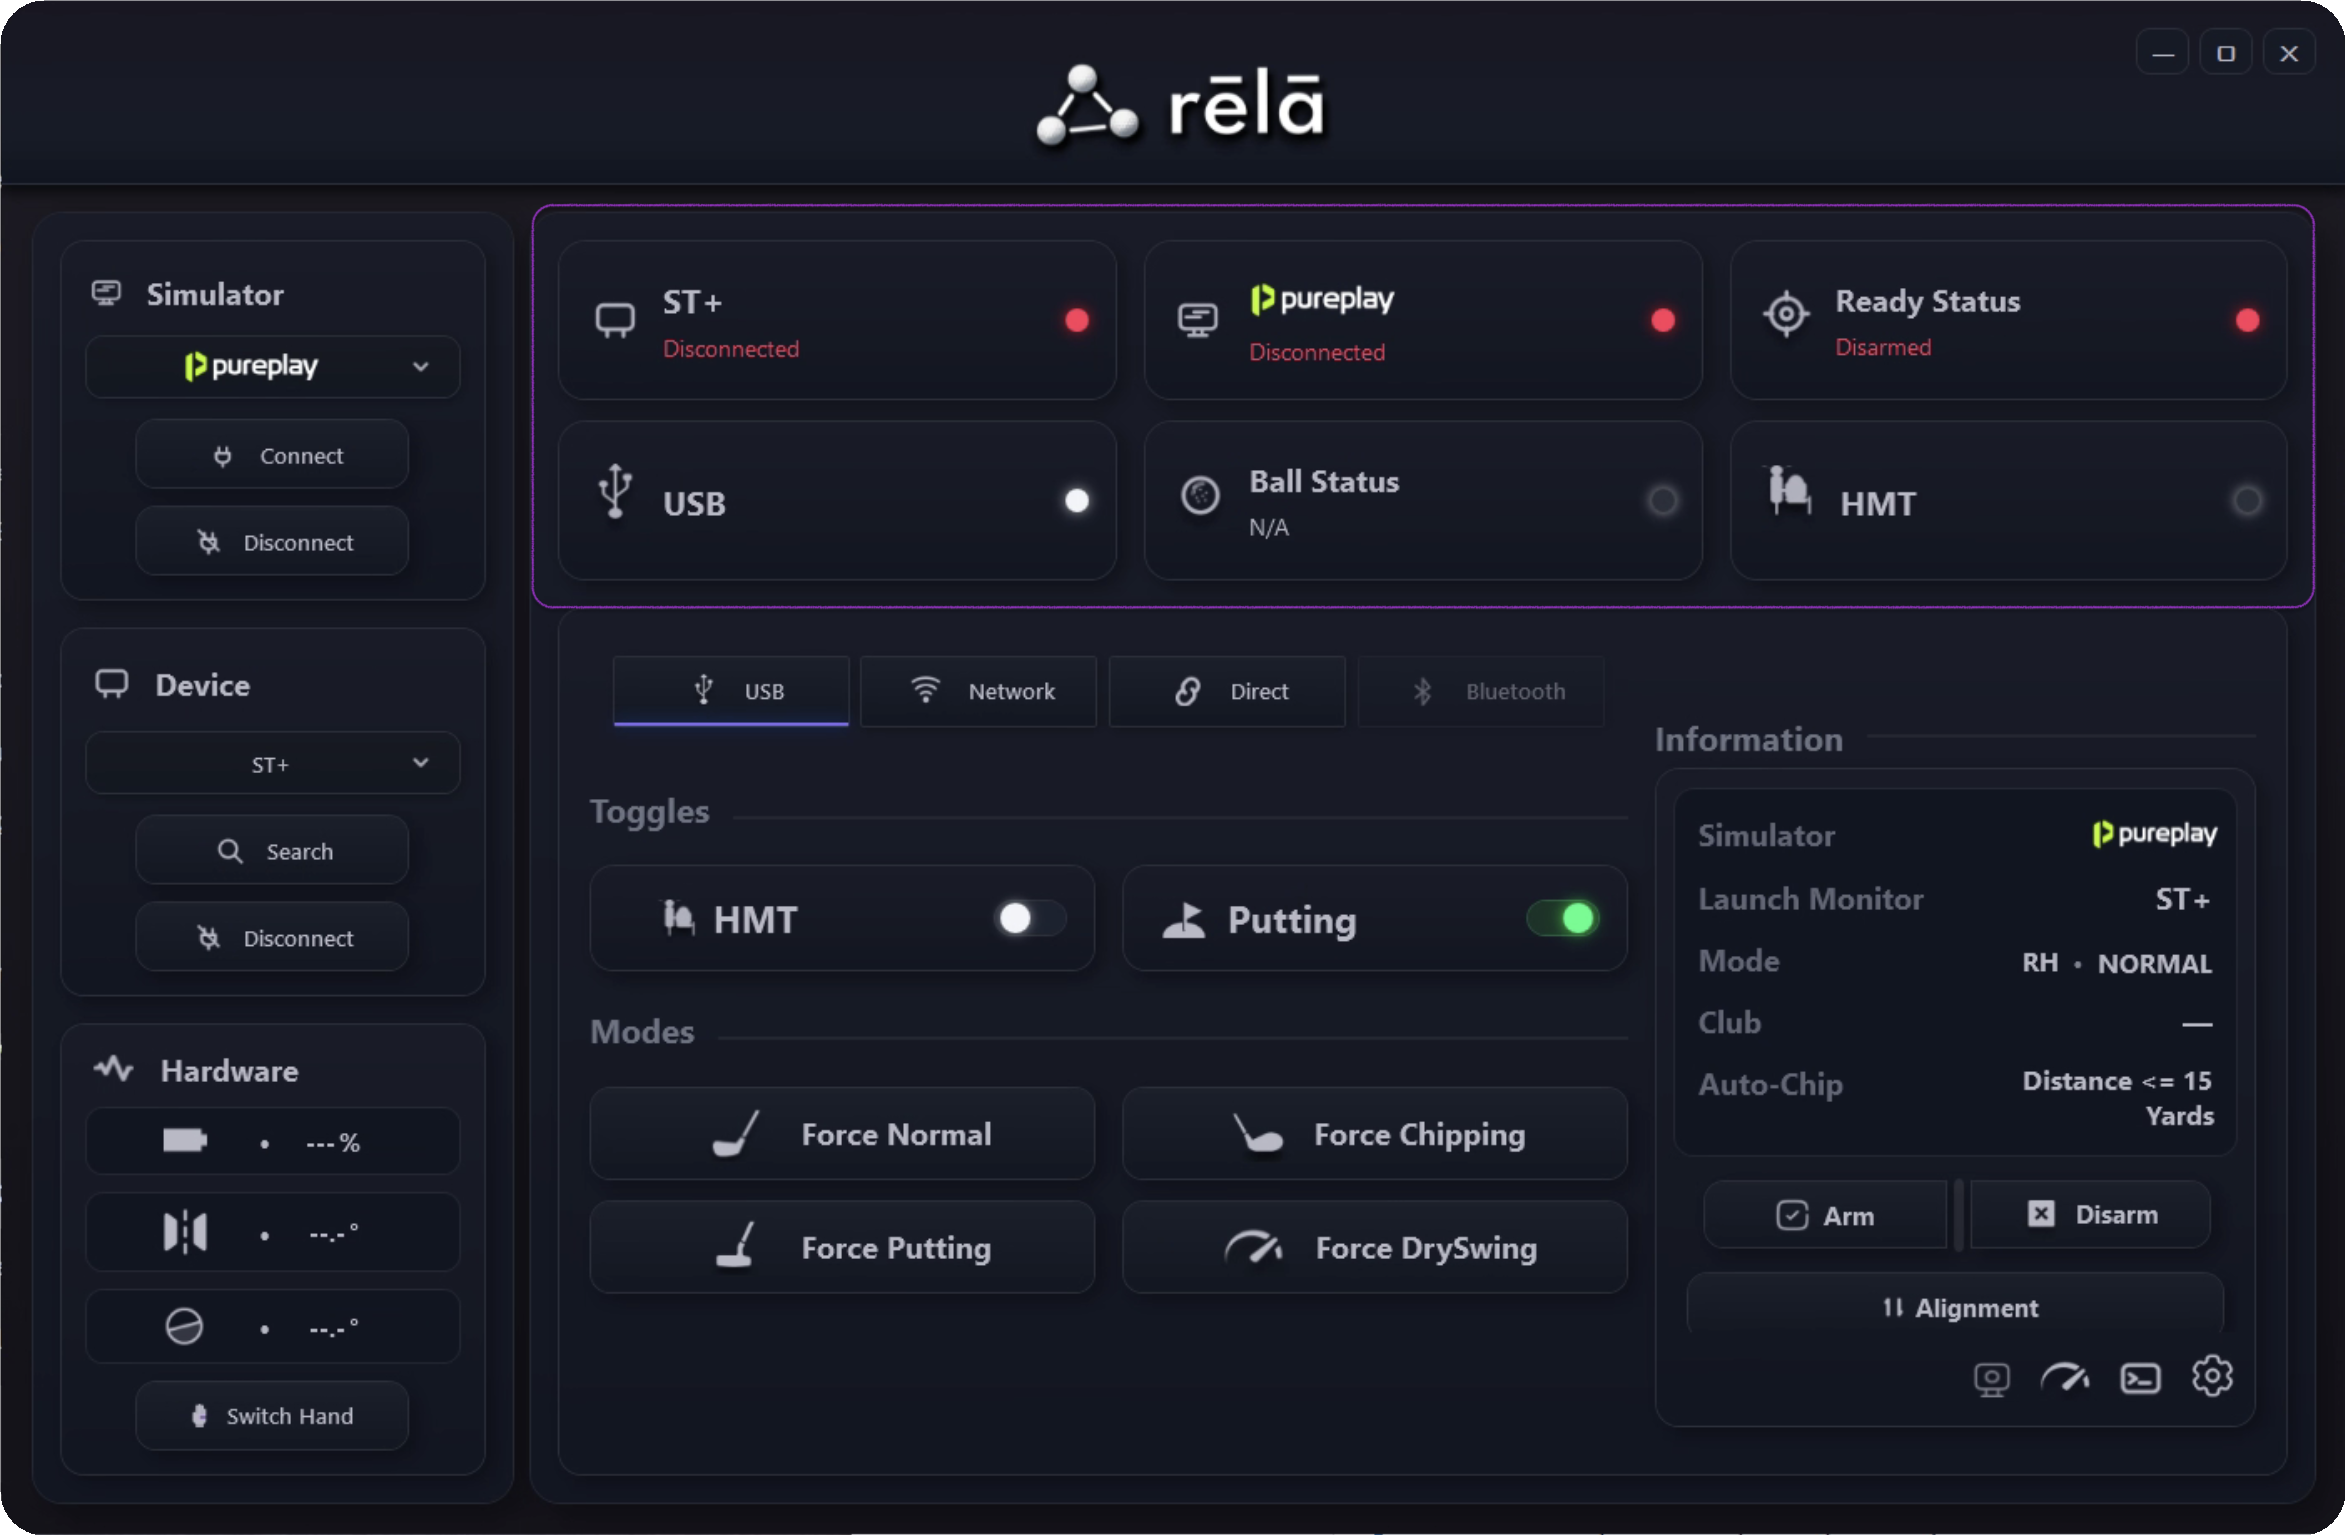
Status and Readiness
| Status area | What it tells you |
|---|---|
| Simulator | The selected simulator and whether rēlā is connected to it. |
| Launch Monitor | The selected device family and its connection state. |
| Ready Status | Whether rēlā believes the selected setup is ready for a shot. |
| Connection Type | Which connection type has been selected. |
| Ball Status | Whether the selected device reports ball presence or a search/waiting state. |
| Mode | The current handedness and game mode when that data is available. |
| Club | The selected or detected club value used by the current shot setup. |
Modes, Putting, and Shot Controls
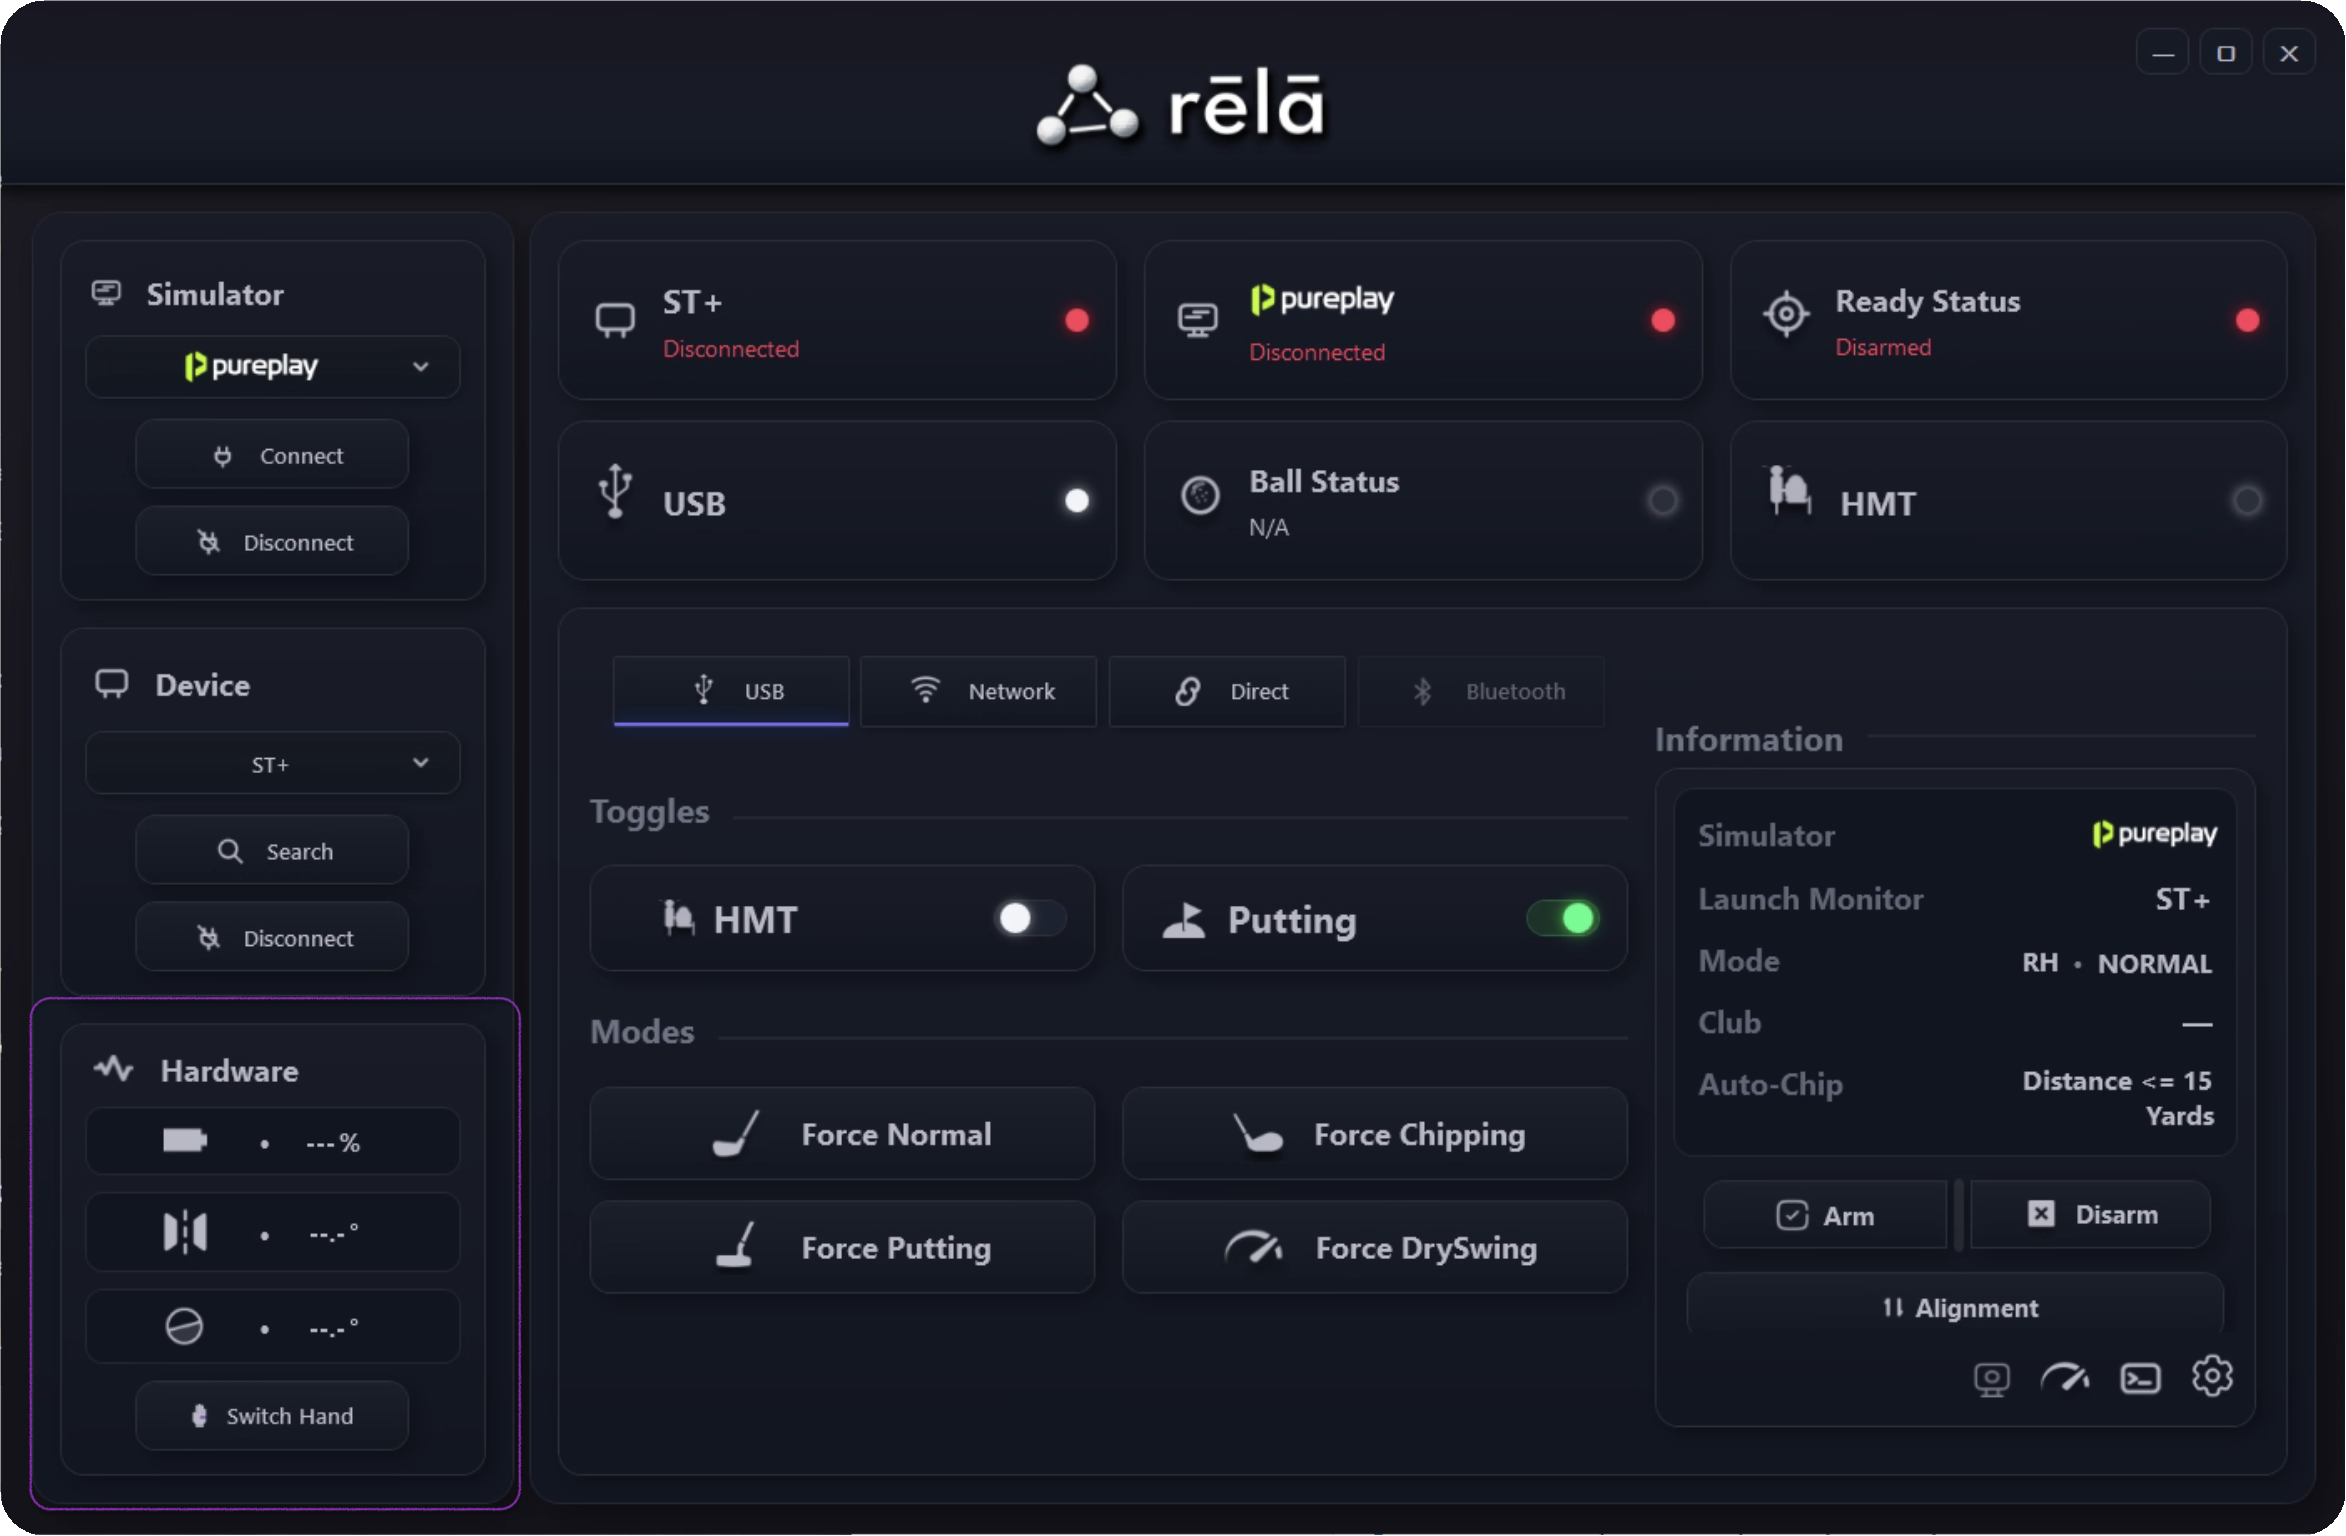
The main screen includes mode controls for setups that support them.
- Switch Hand: changes handedness when supported by the selected device.
- Force Normal: forces normal shot mode.
- Force Chipping: forces chipping mode.
- Force Putting: forces putting mode when supported.
- Force DrySwing: forces dry-swing mode when supported.
- HMT: allows rēlā to know if it should wait for HMT club data for the selected device--only applicable to devices which do not have full club data.
- Putting: allows rēlā to know if the user wants to use putting (turn off for autoputt).
Webcam Putting
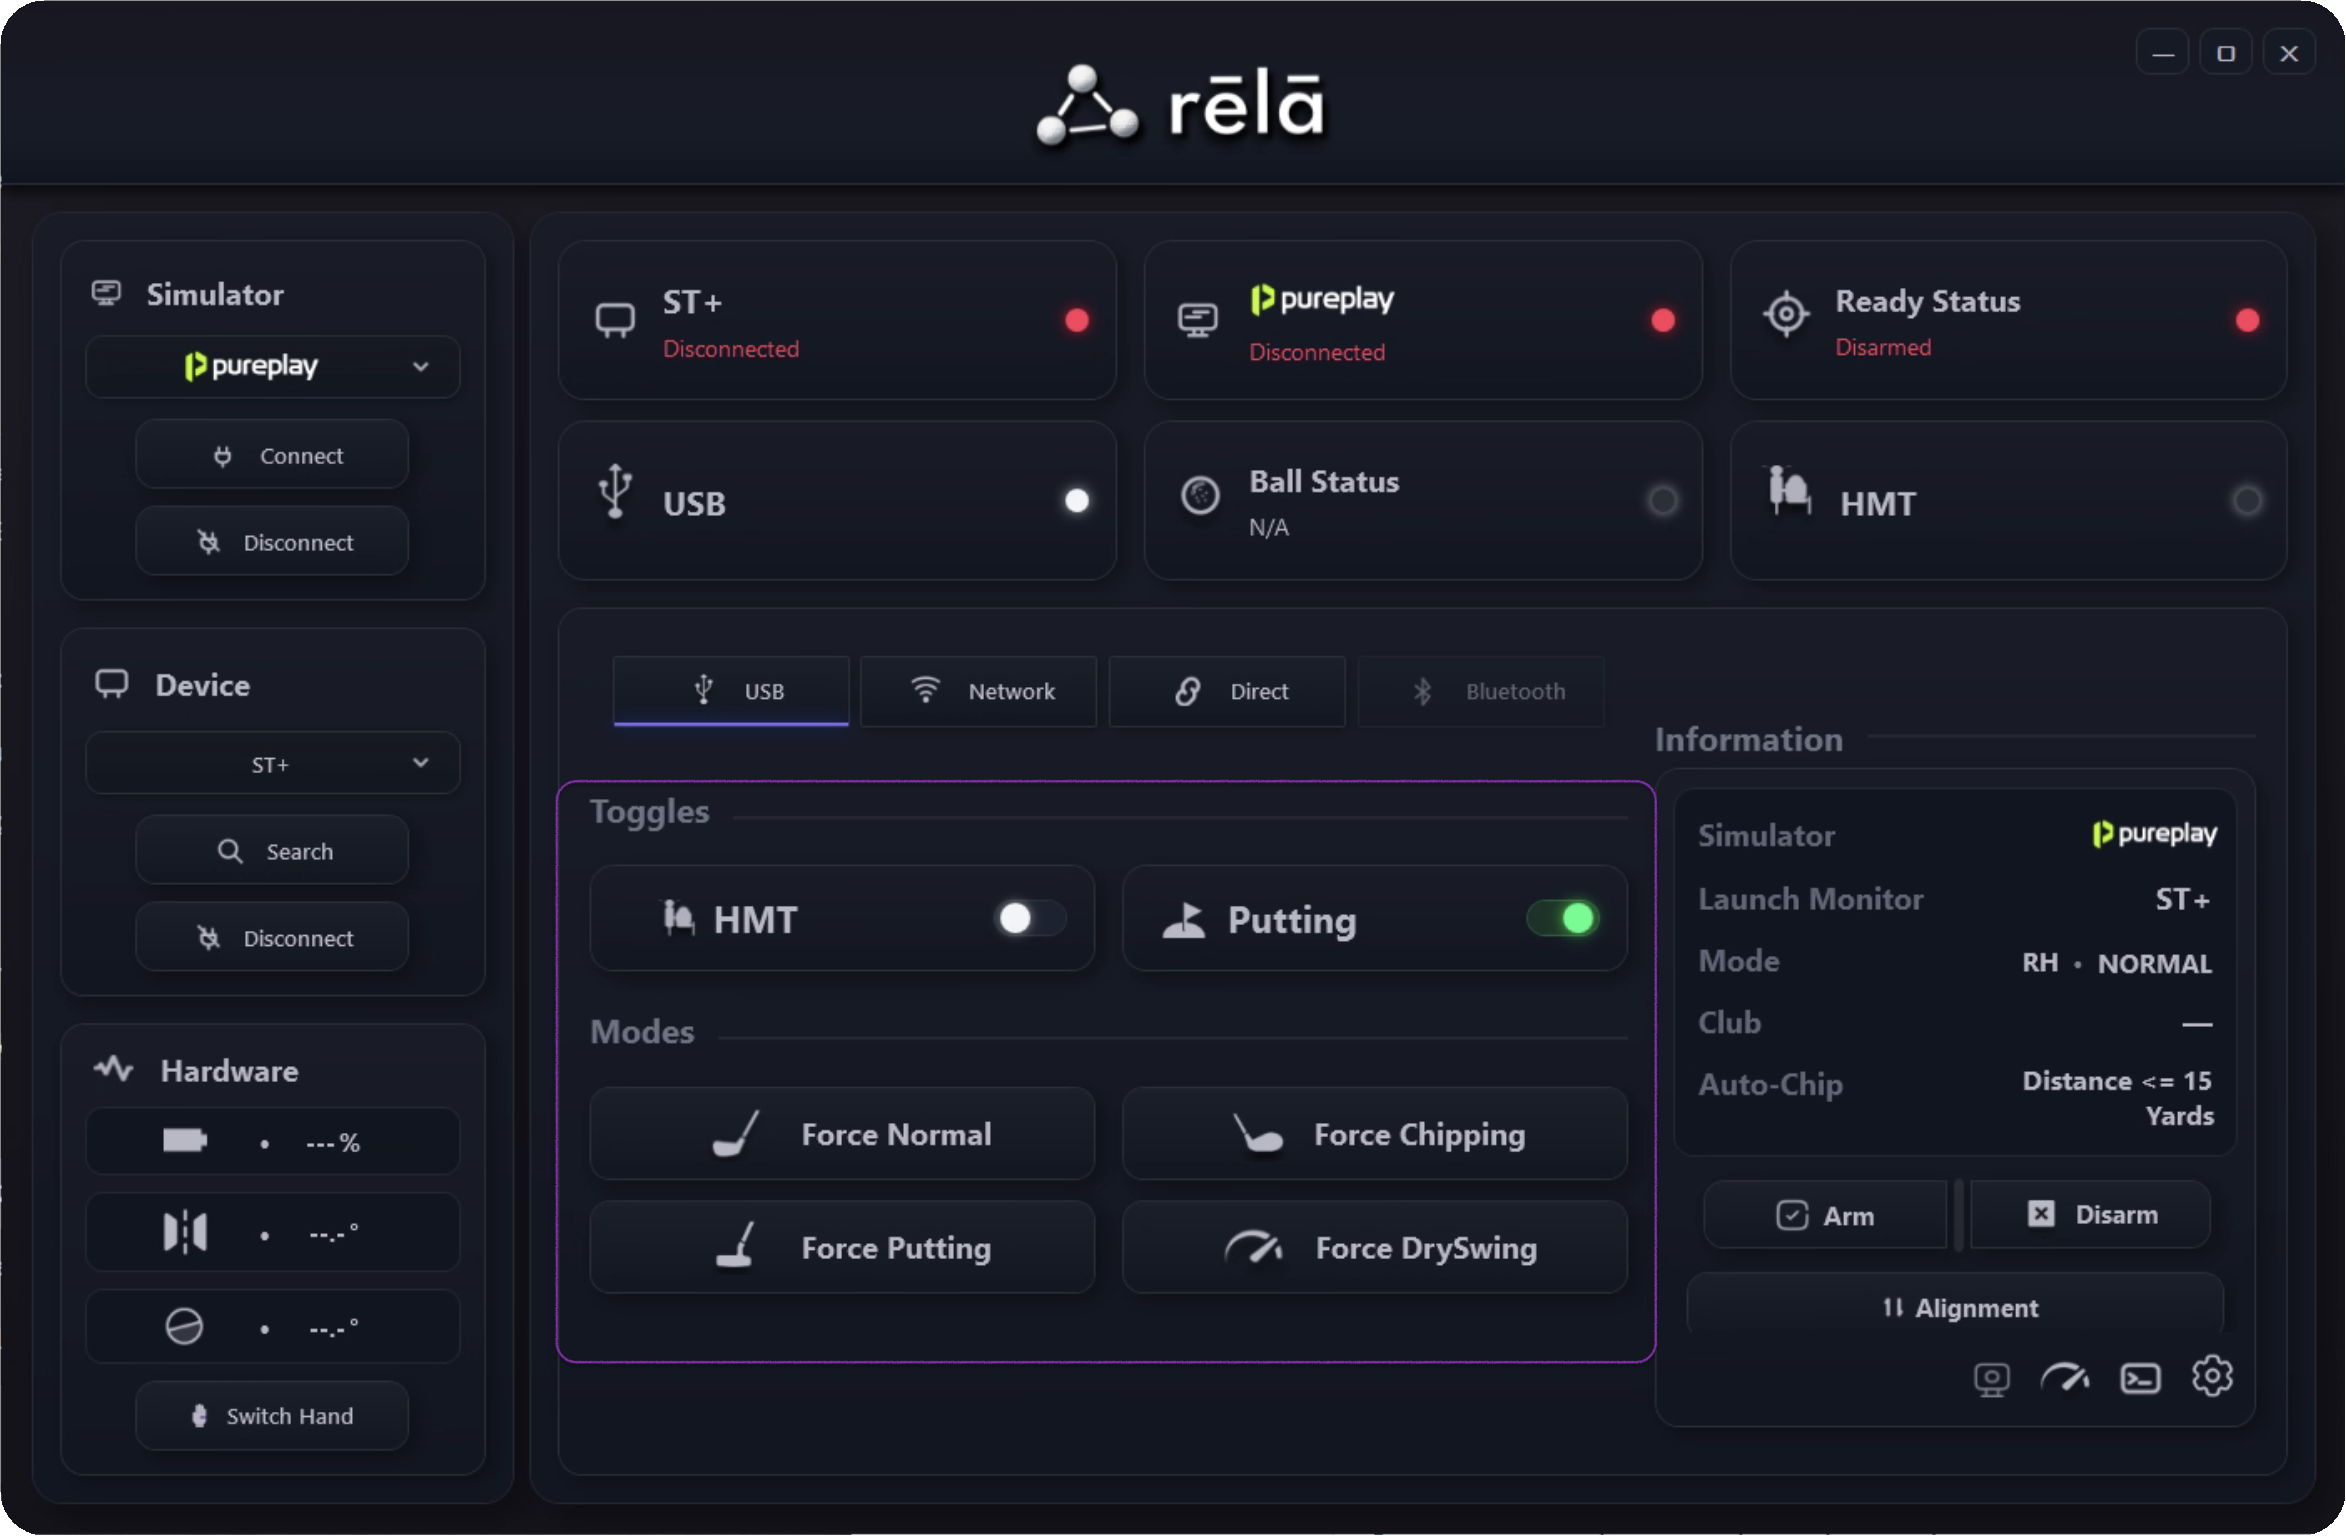
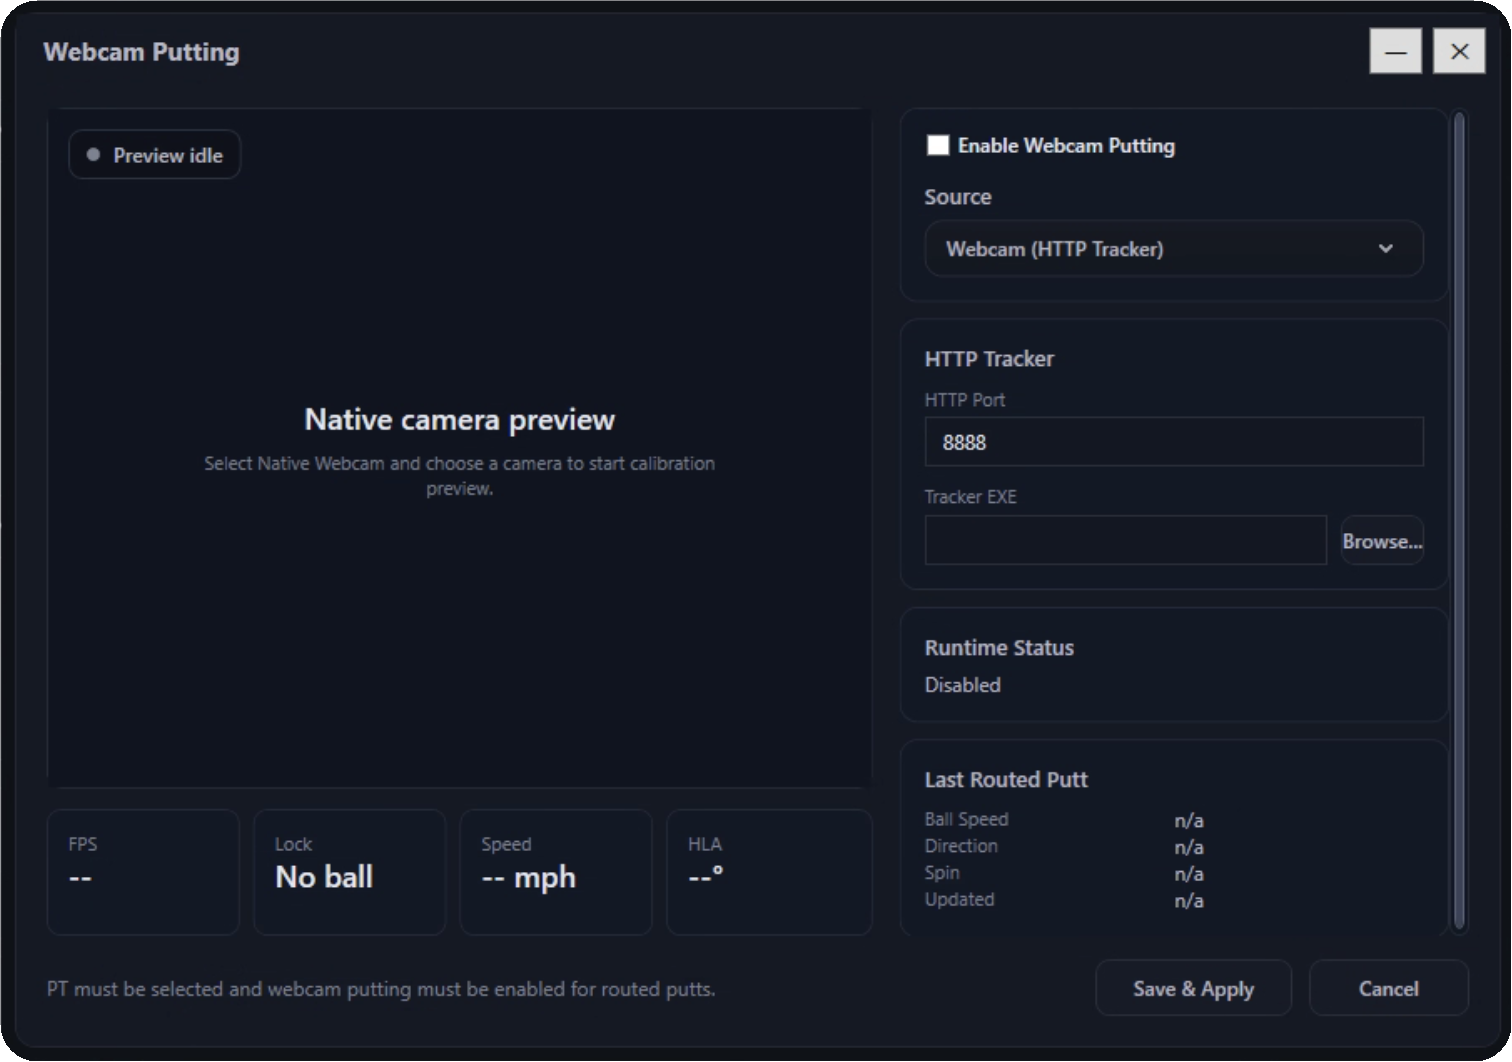
Use the Webcam Putting tool when your setup relies on external putting. Open it from the launcher icon in the lower-right control area.
- Webcam (HTTP Tracker): This looks for the existing webcam method (ball_tracker.exe) and ingests the data--place ball_tracker.exe's location in the HTTP Tracker section.
- Native Webcam: this is my native webcam putting. It is currently in development and will not work yet.
- ExPutt: this currently does not work.
Settings
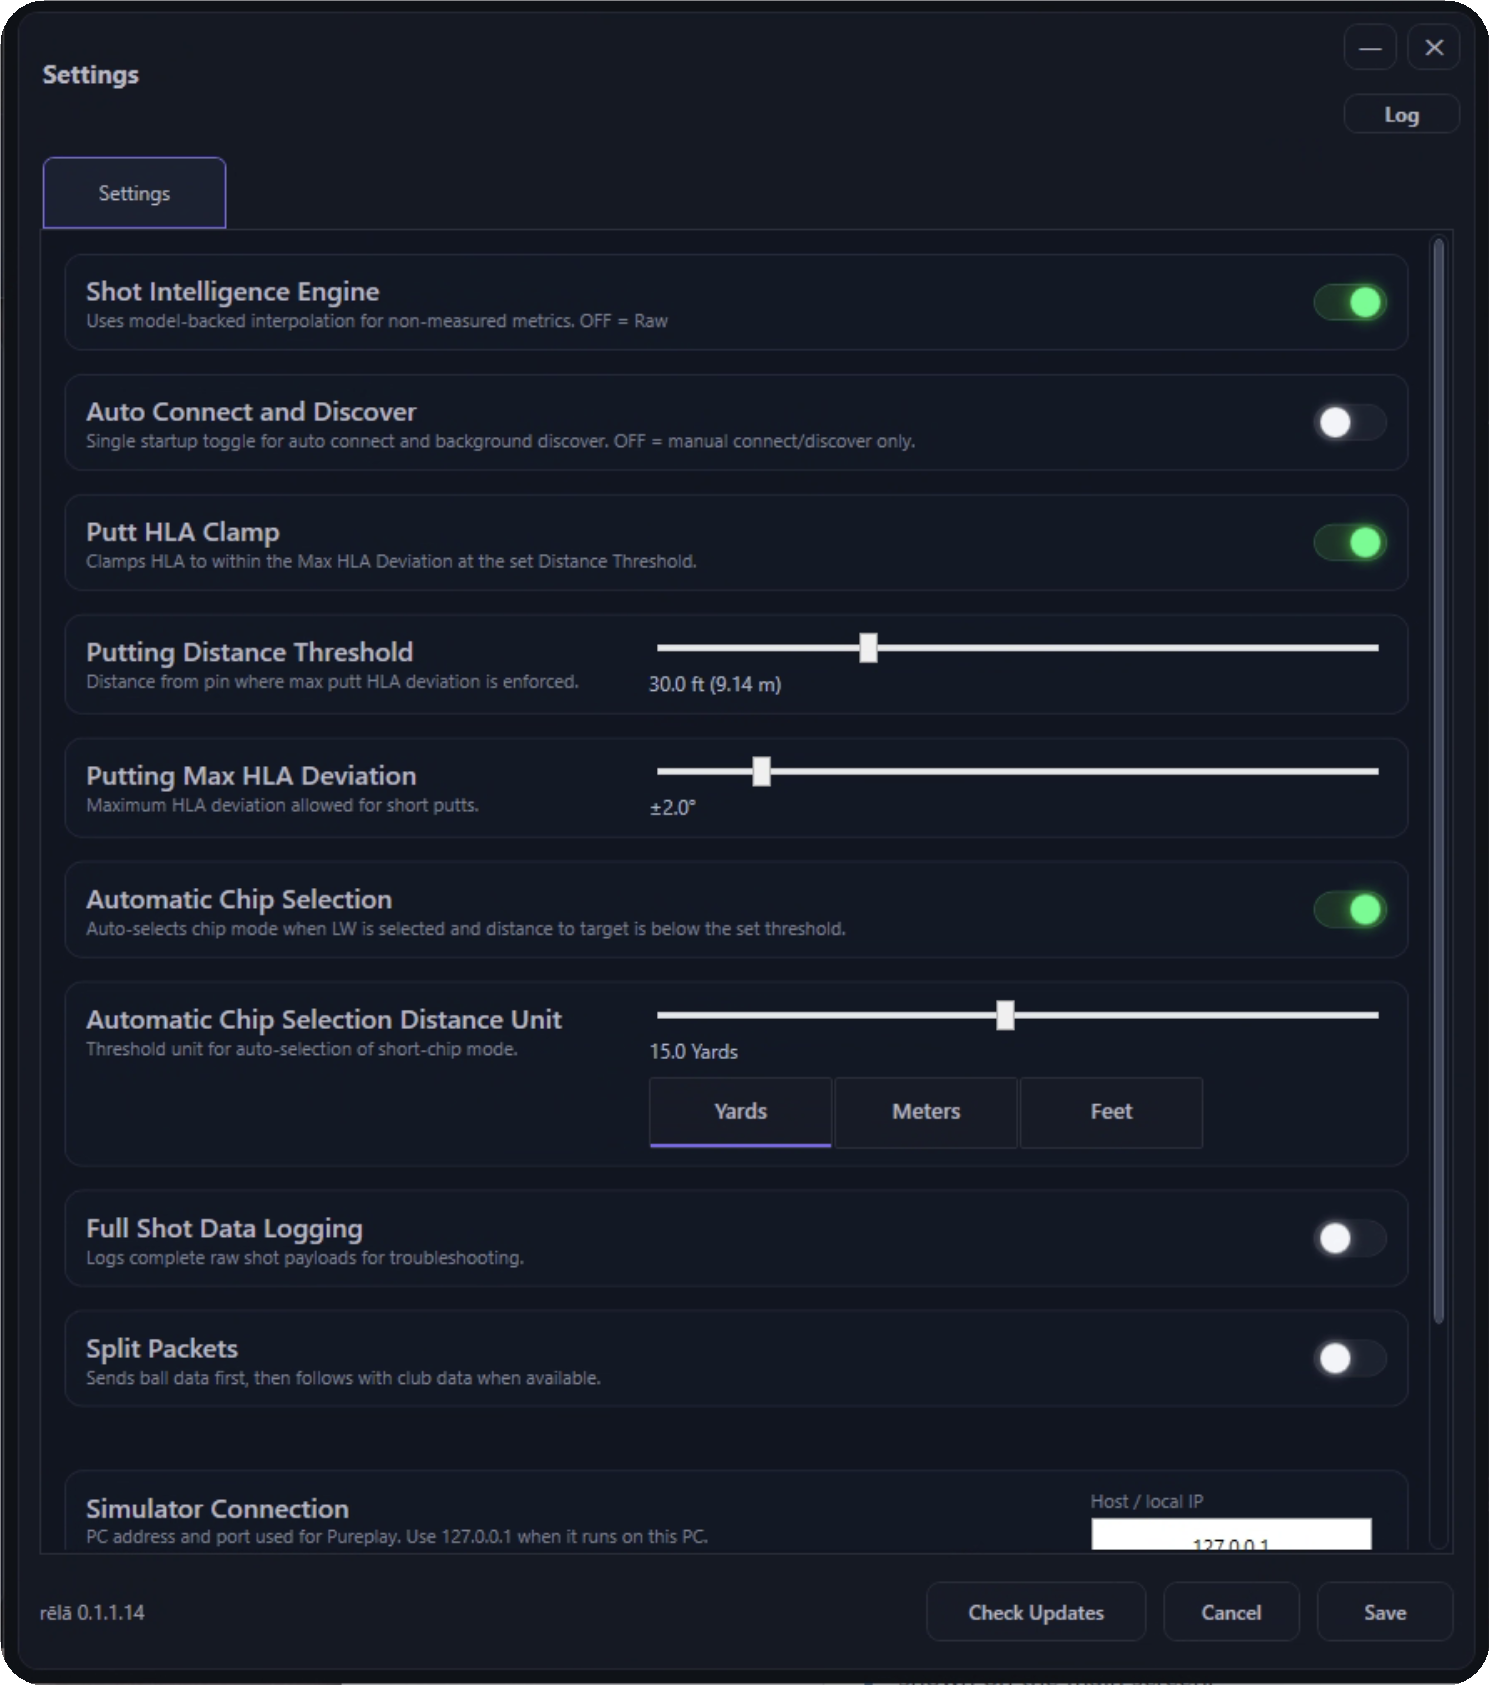
Open Settings from the gear icon. Settings are organized into general behavior, simulator connection, device-specific options, and optional integrations.
Common Settings
| Setting | Use it for |
|---|---|
| Shot Intelligence Engine | Model-backed interpolation for non-measured metrics. Turn on for full data. Turn off for raw behavior. Measured metrics are never manipulated (beyond metric conversion). |
| Auto Connect and Discover | Automatically connect and discover on startup. Turn off for fully manual startup. |
| Putt HLA Clamp | Limit horizontal launch angle deviation for short putts. This will be automatically disabled for events and tournaments, when applicable. |
| Automatic Chip Selection | Switch to chip mode automatically for short LW shots under the configured distance. Only applies to devices which use a dedicated putting mode. |
| Full Shot Data Logging | Write complete raw shot payloads for troubleshooting. |
| Split Packets | Send ball data first, then club data when available. Required for certain devices (FSS) to maintain responsiveness. |
| Simulator Connection | Configure host/local IP and port for the selected simulator. Leave default unless your specific setup requires a change. |
| Tangent | Opt-in only. Send data to your Tangent account when a user-generated connection token is present. |
Advanced Features
Advanced settings include optional behavior for putting, console, logging, and integrations. Leave these unchanged unless your setup needs them.
Updating rēlā
rēlā can check for updates from inside the app. Updates are shown before they are installed so you can review what changed.
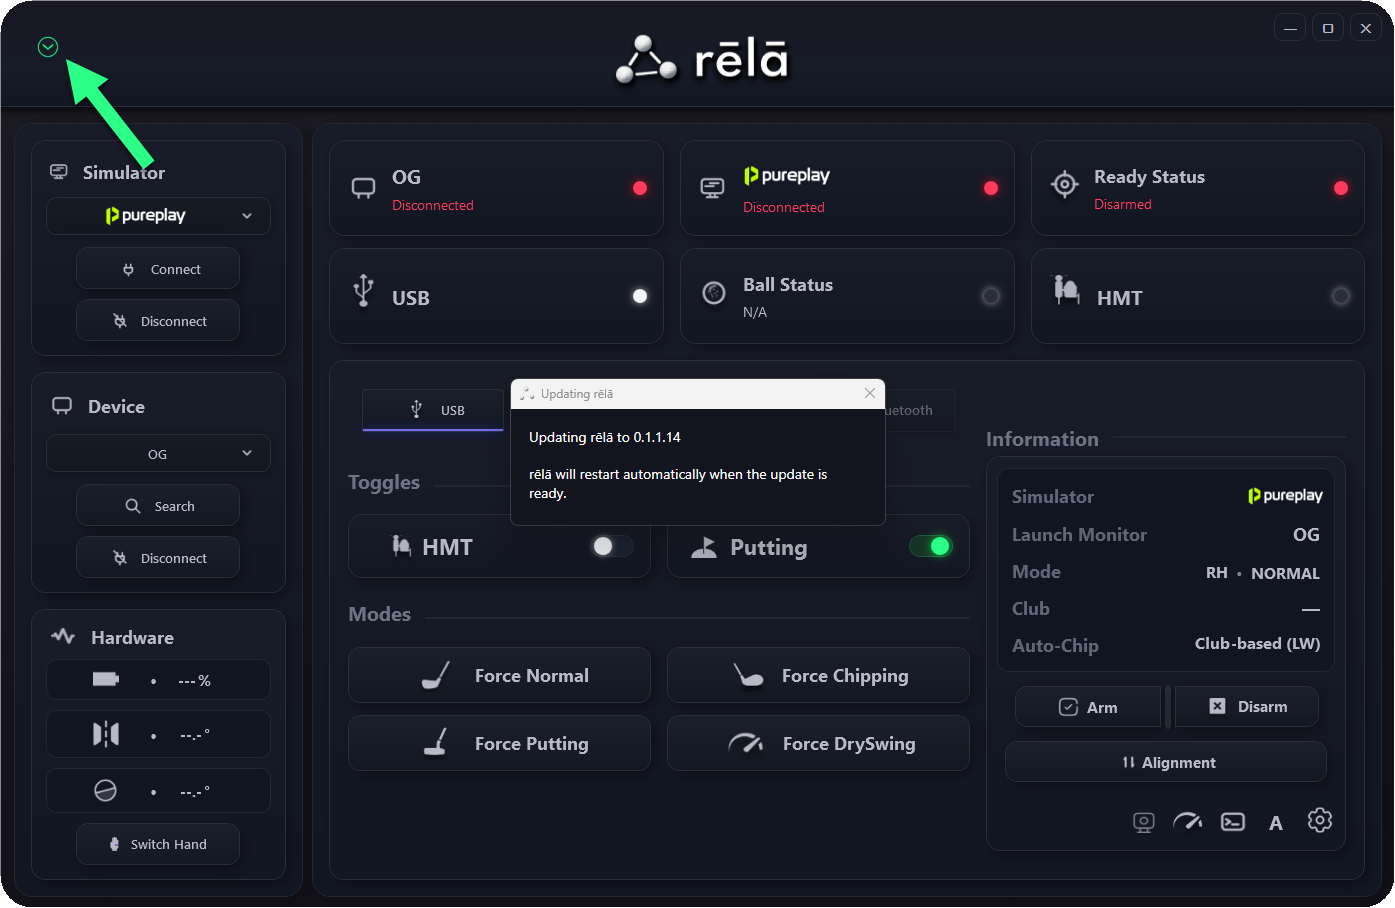
Upper-left update icon
When rēlā finds an available update, a small update icon appears in the upper-left corner of the main window. If no update is available, this icon is hidden.
Settings check
You can also open Settings and click Check Updates. This forces rēlā to check again instead of waiting for the background check.
Expected update flow
- Click the upper-left update icon, which will only appear when an update is available, or open Settings and click Check Updates.
- If an update is available, rēlā shows the available version before installing it.
- Review the release notes. This is the changelog for the update.
- Choose Update or confirm the install prompt to install it. If you are not ready, choose the Remind me later option shown in the pop-out.
- During installation, rēlā shows an update progress window.
- When the update is ready, rēlā closes and restarts automatically.
- After restart, rēlā shows an update-complete message when the update finished successfully.
How to see the changelog
The changelog is shown as release notes before installation. The upper-left update icon opens the update dialog with a Release notes area. Settings > Check Updates also shows the notes in the update prompt when an update is available. Read the release notes before approving the update.
Troubleshooting
| Problem | What to check |
|---|---|
| Simulator does not connect | Confirm the simulator is running. Check host/local IP and port in Settings. Confirm firewall rules allow the connection. Most connections happen instantly. If it does not, it likely won't connect. |
| Launch monitor does not connect | Confirm the LM vendor app is installed. Confirm the correct device is selected. Rerun installer repair if setup previously showed a red result. |
| Setup said a device link was not created | Read the red setup result. Install the missing vendor app or install the required vendor software and rēlā on the same drive, then rerun setup. Only install software you are entitled to. |
| Ball status does not change | Confirm the selected launch monitor supports ball-presence reporting. Some setups show readiness differently. |
| Shot does not appear in simulator | Confirm simulator connection, launch monitor connection, selected mode, selected club, and simulator host/port settings. In some situations, simulators need their connection side reset once everything is connected. If you see shots in rēlā's console, it is likely the simulator connection that needs to be reset. See the manual for the simulator to reset their respective connections. |
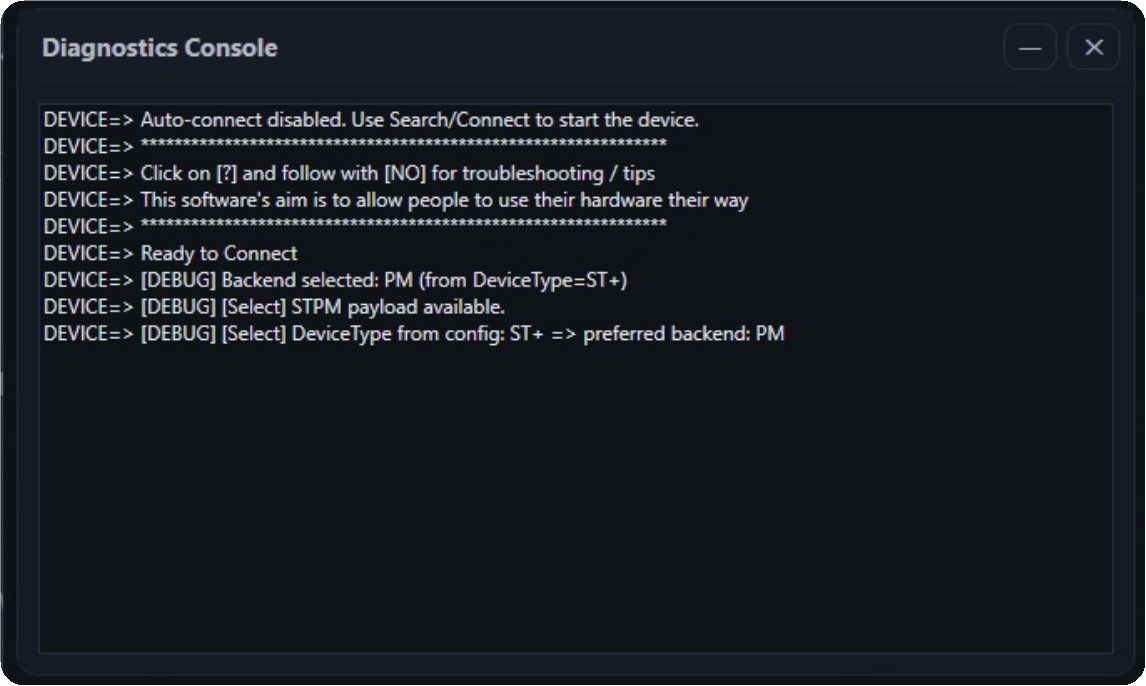
| Need support details | Open the log folder from Settings or use the Console window to inspect recent status messages. |
| What if my Launch Monitor is not supported/listed? | Some launch monitors require their own software to run and some have protections in place to prevent users from getting their data their way. Since rēlā has a strict policy not to break digital locks or bypass entitlement, some LMs will not be supported. If you believe your device should be, let me know. If it is feasible, fits into rēlā's policies, and there is bandwidth available, it can be added. There is an optional "Other" Device option whose API surface is open source. That is available for community plugins to be made in instances where there are not enough users, bandwidth is not available, etc. to justify a native connection, but people still want to use rēlā. |
Repair or Change Setup
Rerun the installer if you change launch monitors (only needed if the new vendor requires it), install missing vendor software, move software to a different drive, or need to repair device links.
Community and Support
Thank you to the simulator and launch monitor community for testing, feedback, edge cases, and the practical knowledge that makes tools like this better.
Fuel the next round
If you like what I do, or if rēlā made your setup better in some way, or made your launch monitor behave like it finally got the memo, consider tossing a coffee toward the workbench. It helps, and keeps the late-night testing, weird edge cases, and stubborn integration work moving.